PEX – Plumbing Made Easy (sort of)
It became clear to us pretty early in our remodel that the plumbing in our house would need to be completely overhauled. The master plan called for essentially two new bathrooms, and a reconfigured kitchen. What other plumbing does a house have?
Well, we also decided to add a radiant heating system to both floors. Suddenly, the plan involved adding a boiler and indirect-fired DHW tank. New kitchen + new bath + new bath + new boiler + new tank + new radiant floor = all new plumbing. The only original plumbing remaining is the basement bath, and the main line to the house (which I intend to replace next year, lest it decide to burst after 50+ years in the ground).
Aside from the boiler-room work, I decided to do all of the plumbing work myself. I’ve had bad experiences with plumbers, and my wallet has had similarly bad experiences with them. Fortunately, the guys we got for the boiler aren’t really “plumbers”. I would call them “engineers” or “artists” before I called them plumbers. But that’s a different story.
I had a choice: I could learn to sweat copper, or I could use this nifty stuff called PEX that I’d seen on the TV show “This New House We Created Out Of The Husk Of An Old House For Two Million Dollars” (great show, by the way, if you can stomach it).
PEX is plastic pipe. More accurately it is “Crosslink Poly-Ethylene tubing”. Read about it at Wikipedia. PEX can be used for hydronic heating (as in our radiant floor), or for potable water. There are a lot of advantages to PEX: it’s easy to work with, it’s relatively inexpensive, it won’t corrode. It’s also flexible and can even be bent to go around corners (sweeping curves…) which eliminates a number of would-be copper fittings. The one disadvantage in my mind is that you can’t buy fittings for it (or tools to work it) at Home Deposit. Many of you might not find this to be a disadvantage, but considering the number of trips I tend to make to the hardware store for fittings during the average plumbing project, this is a problem for me. I have to plan in advance what I need and make a trip across town to the one supplier in Seattle for the specific fittings I need.
That raises a good point to make: While there are pretty much standard sizes and grades of PEX tubing, there are several different “systems” for fittings that work with PEX. Each manufacturer has their own line of proprietary fittings and tools. Unlike copper, where an elbow is an elbow, once you choose a PEX supplier you’re pretty much locked into their system. They lock you in by the shear cost of the tools needed to crimp their fittings. I got lucky and obtained a set of tools for around $300, which was below the supplier’s cost (last year’s model, and he was feeling generous I think – thanks Jay!).
The system I bought into is Viega PureFlow. It seems pretty good, but there are others out there. I’m with this one because that’s what my boiler installer uses, and he loaned me his tools for a week to try them out.
In any event, the point of this post is to demonstrate how the system works. Let’s get started:
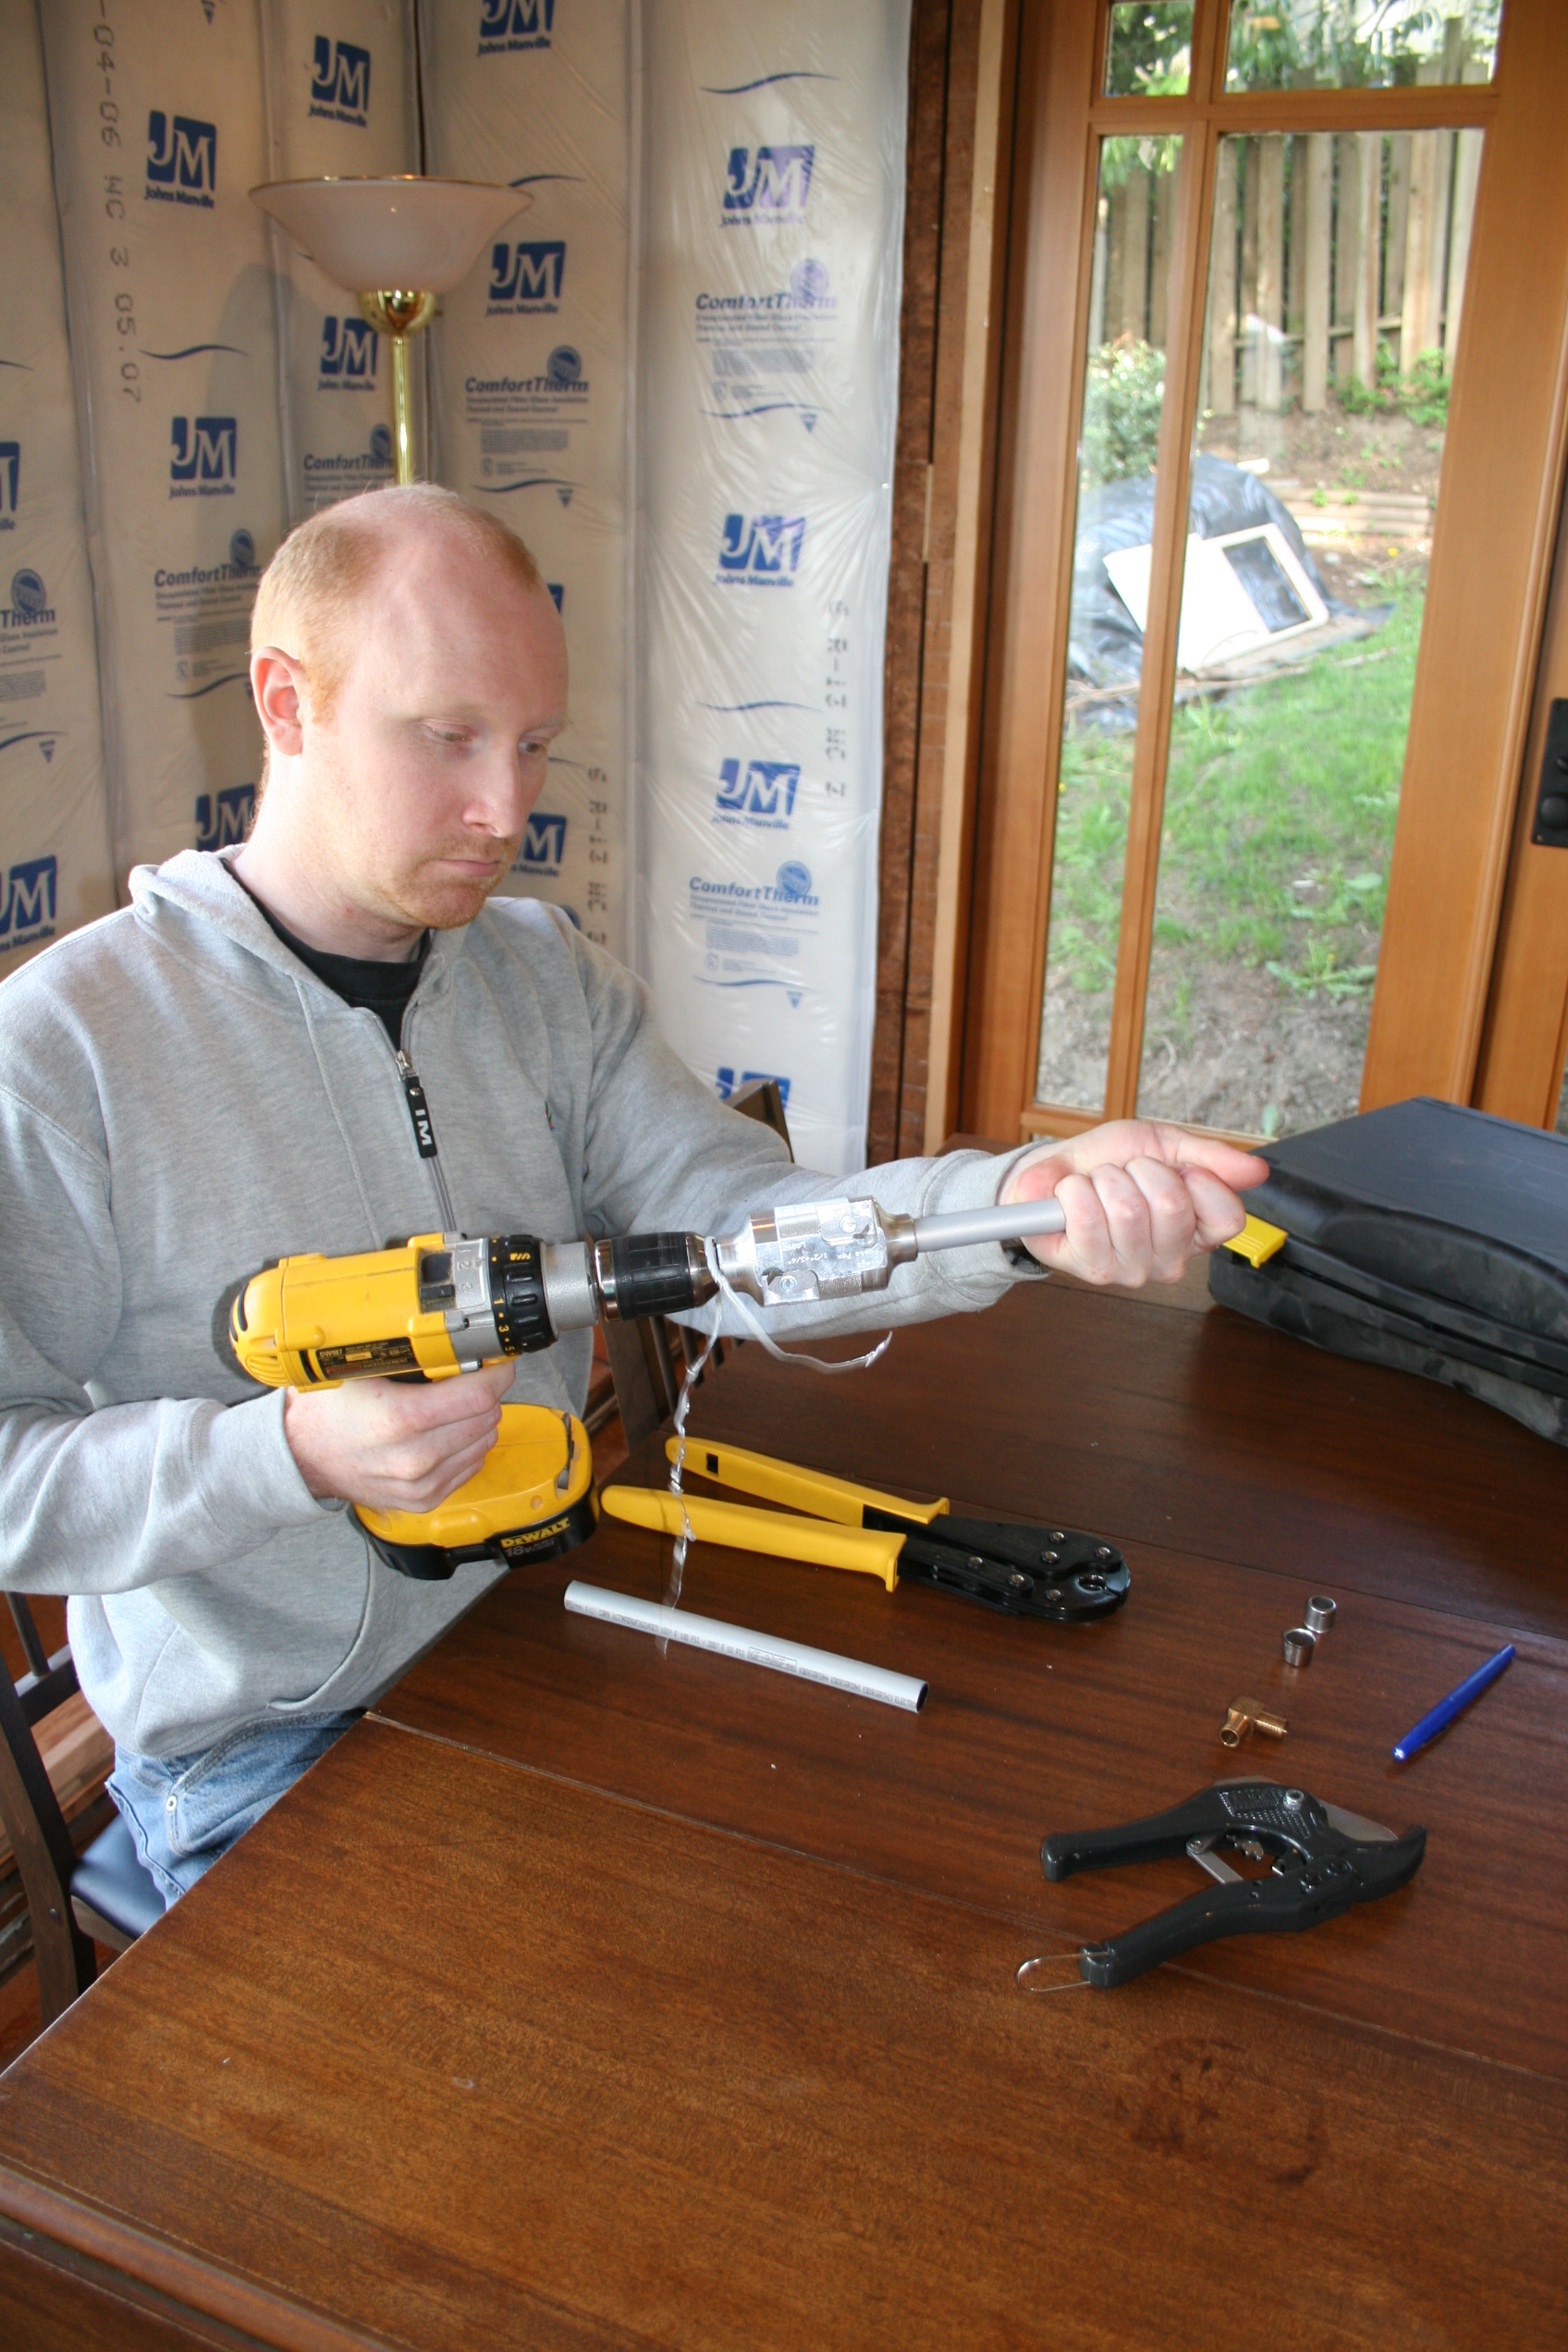
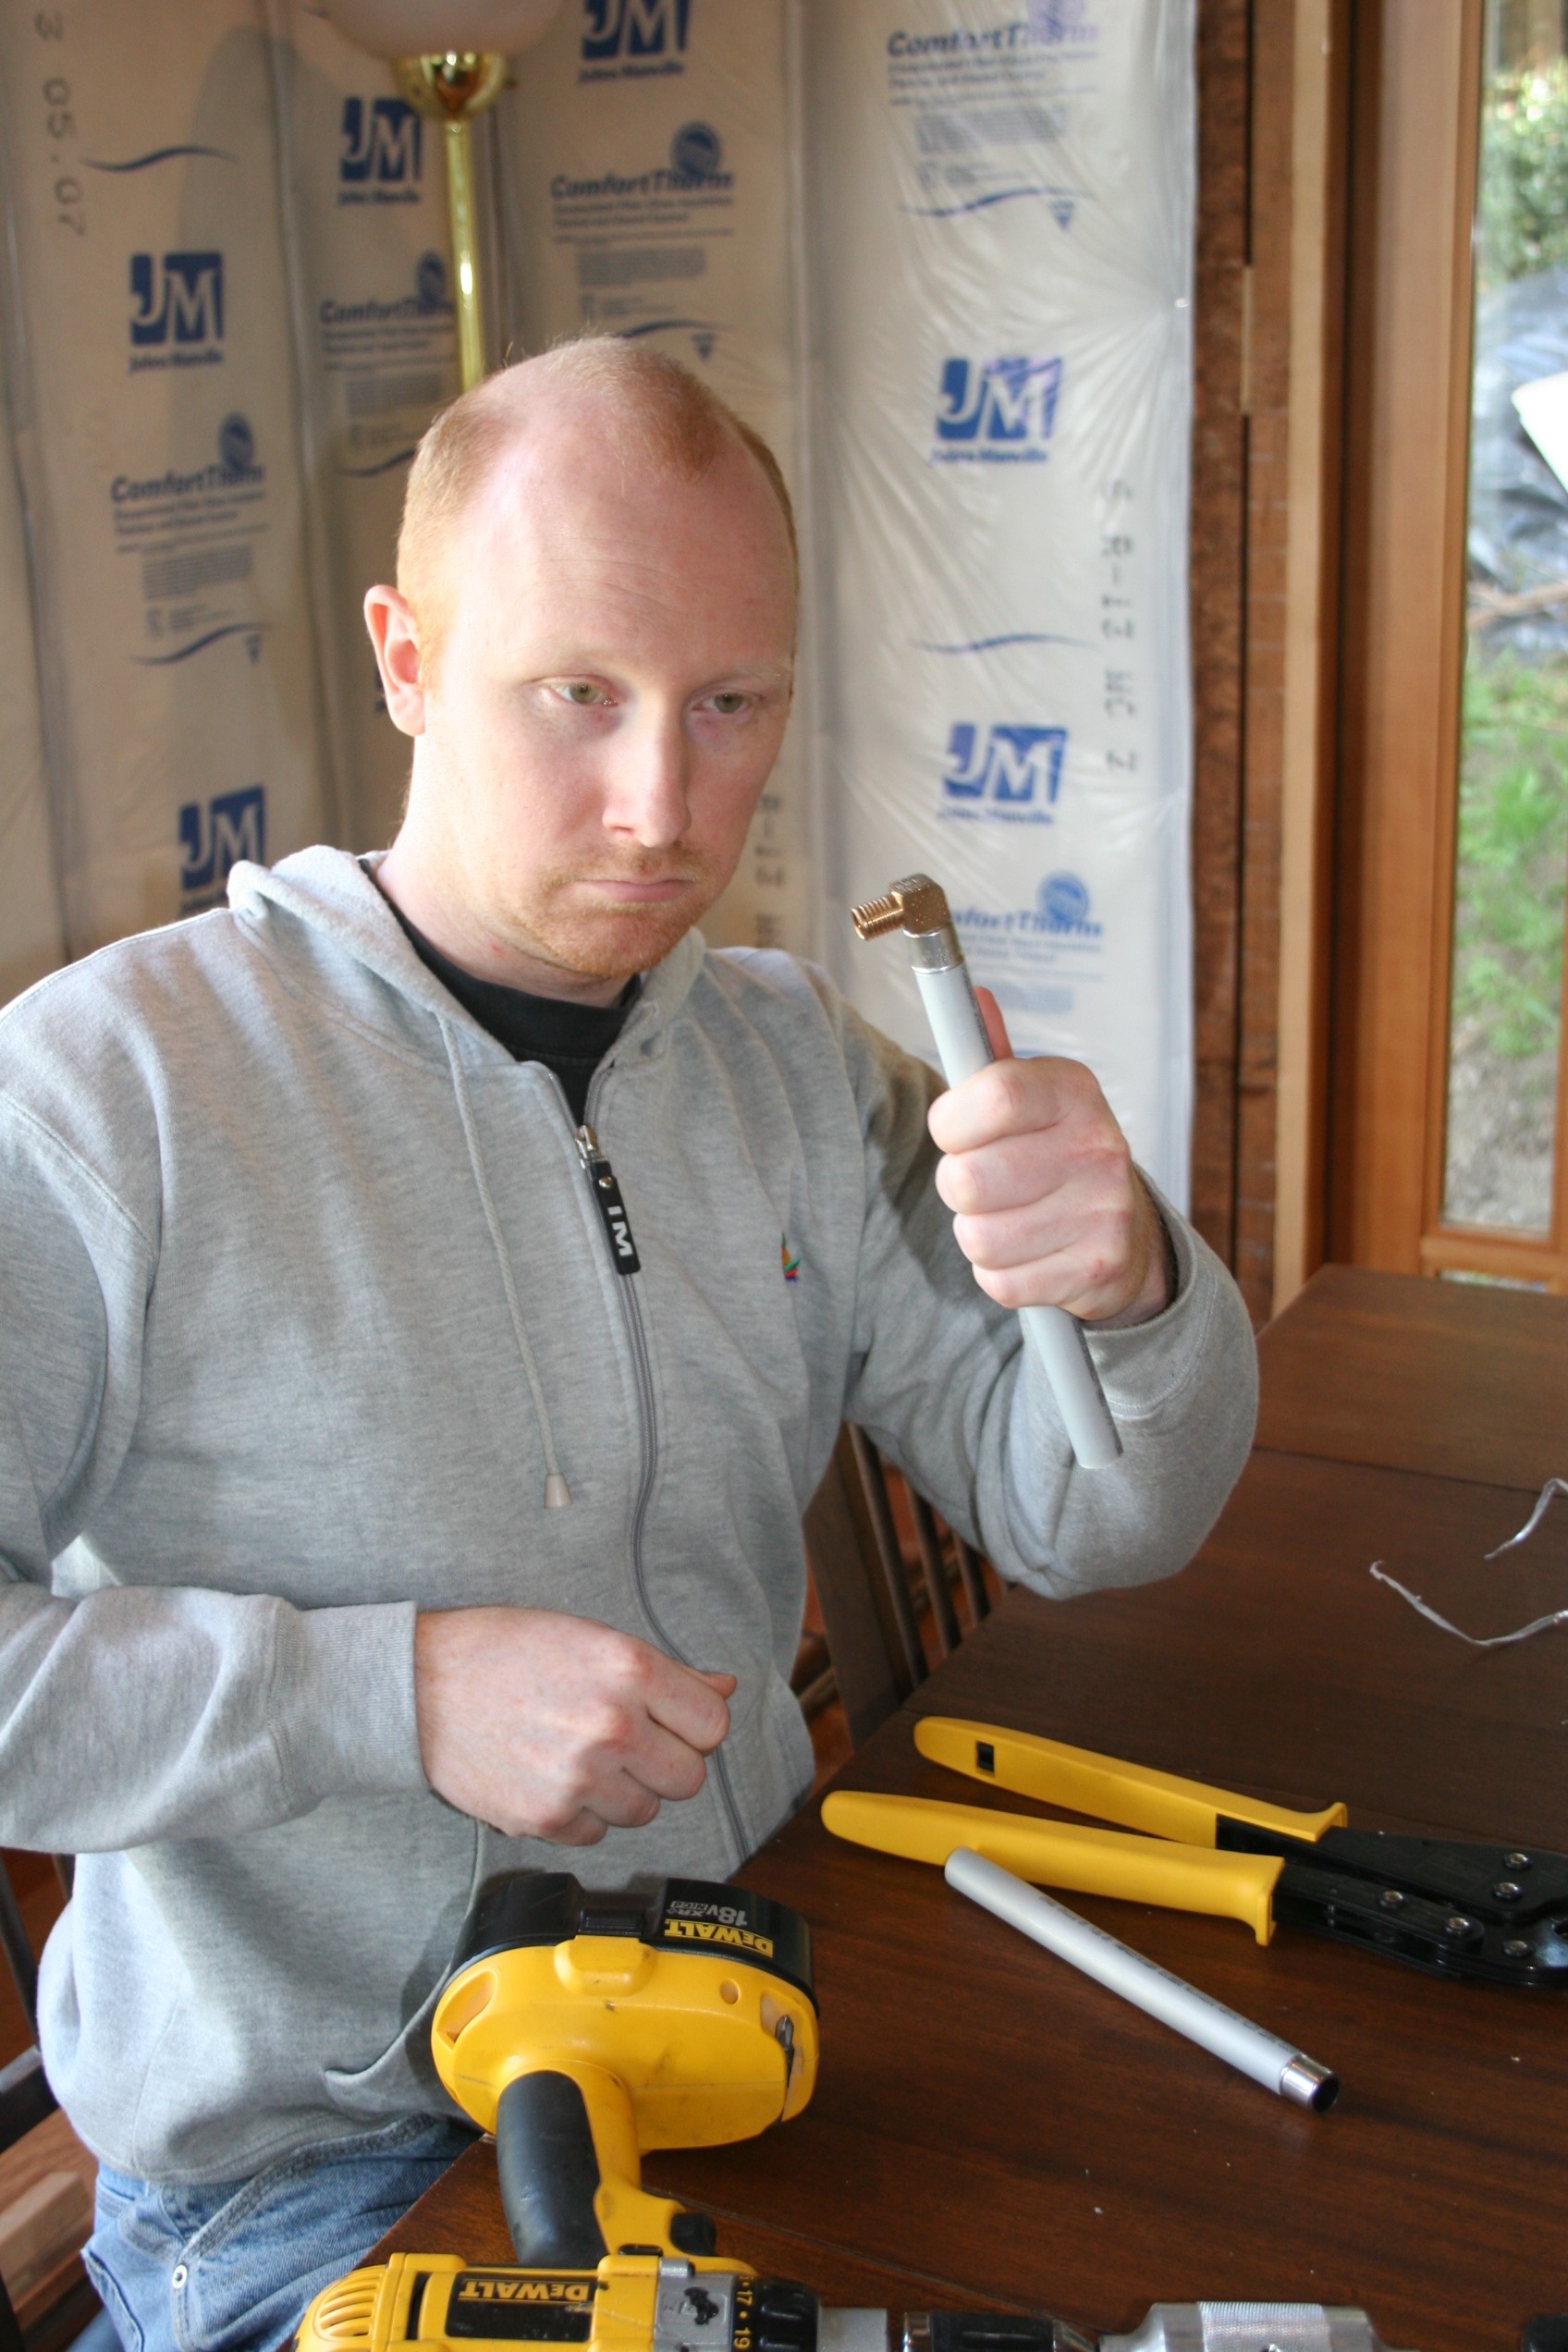
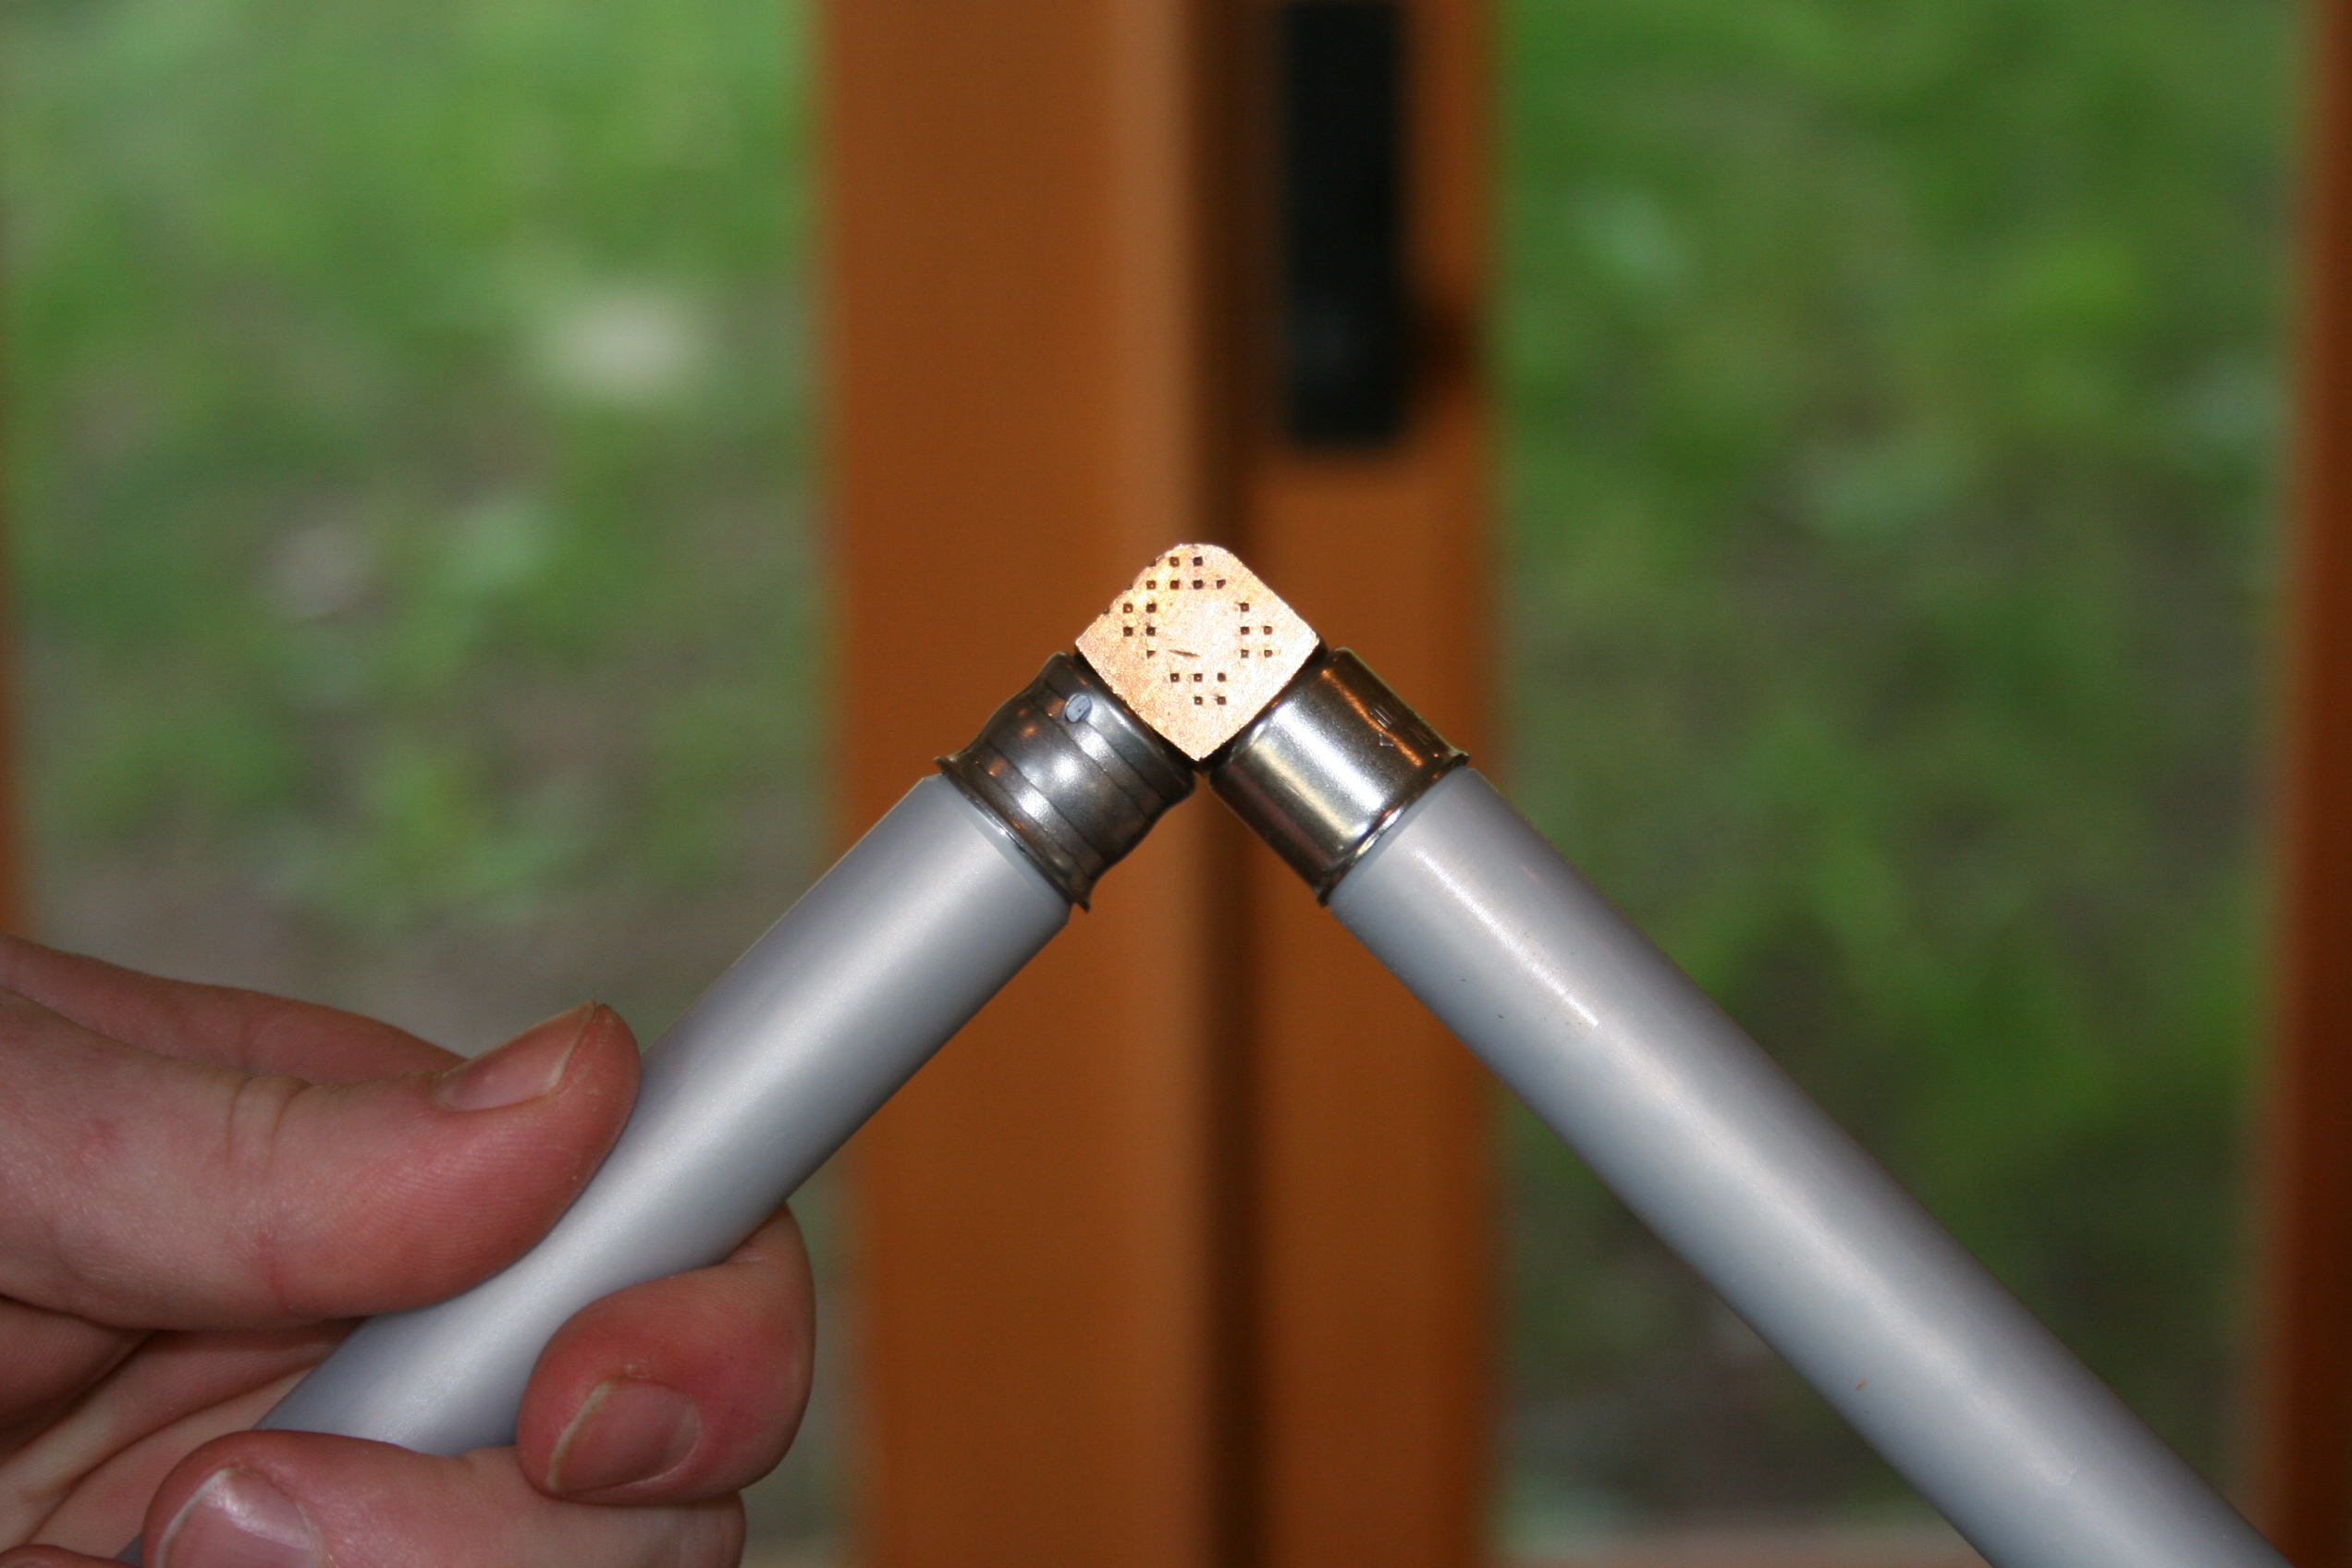
First, here’s what you start with. From left to right: the drill is used in conjunction with the shiny metal device under my right hand to prepare the tubing – more on this in a moment. The yellow-handled device is the crimp tool. The brass fitting is a 90-degree elbow, with two crimp fittings next to it. In my left hand is a tubing cutter, and in front of me is a piece of ½ tubing.
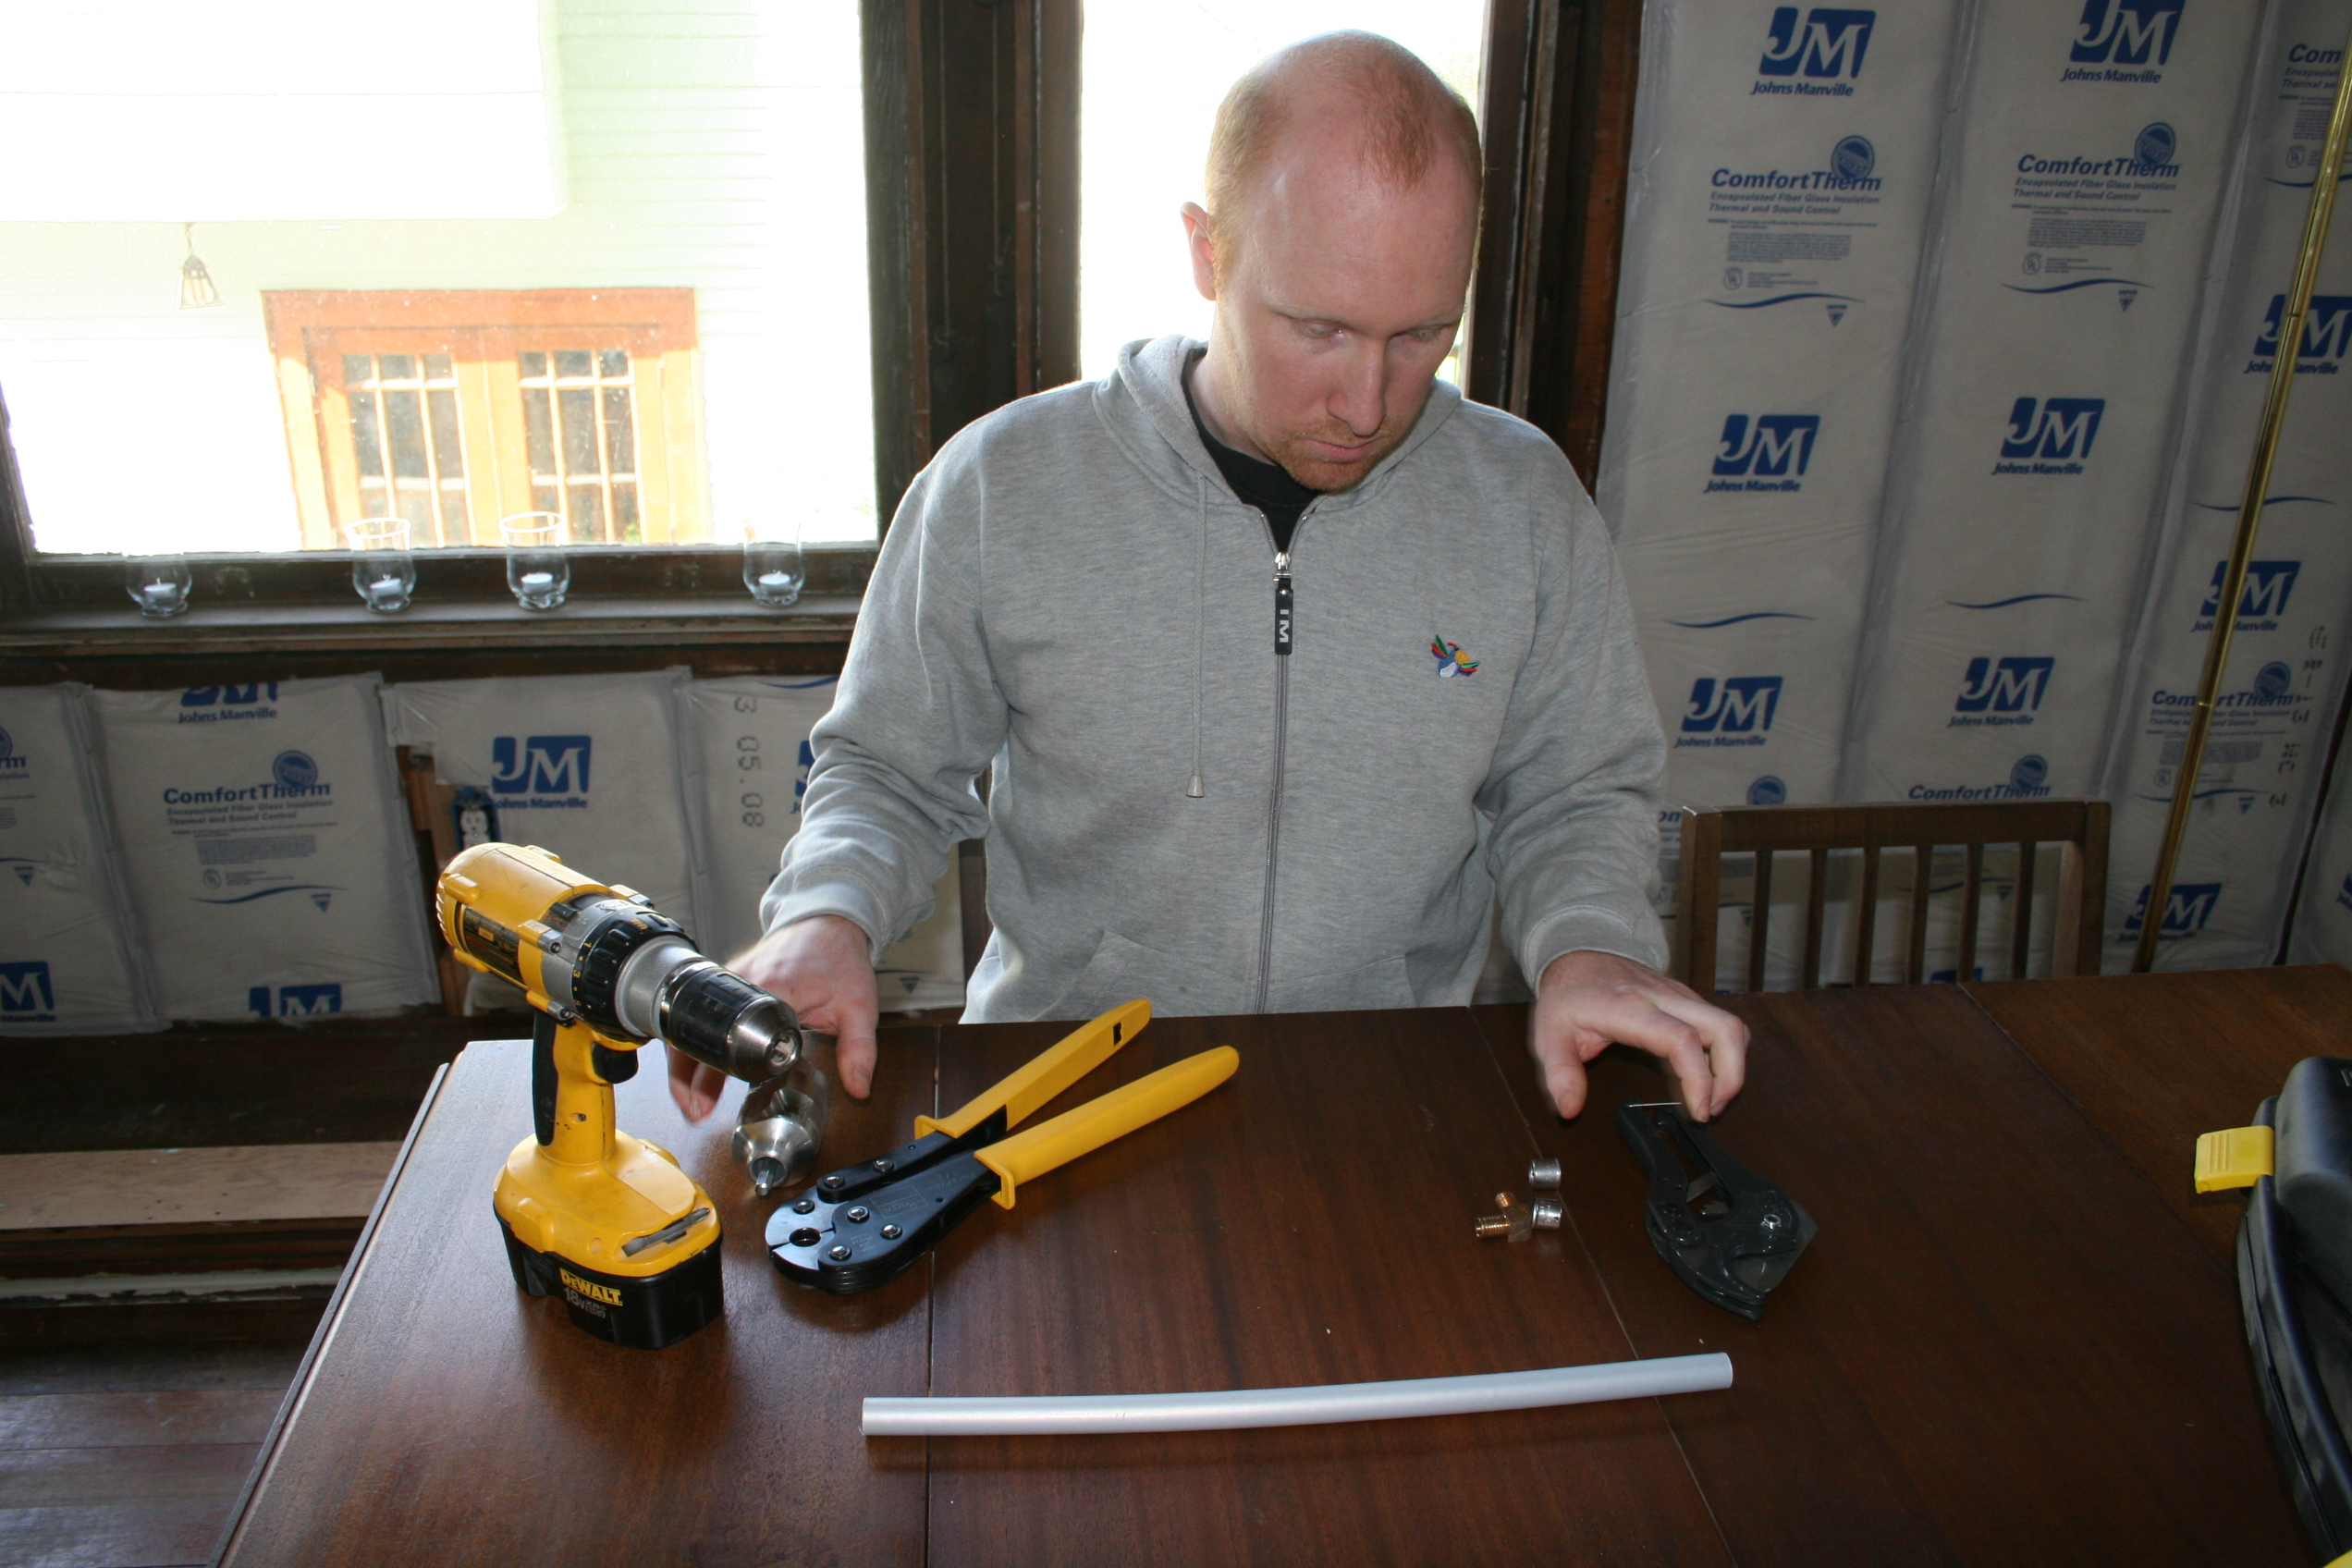
I should point out that you need different tools for different diameters of tubing. And this costs more $. For my system, the bare minimum toolset was for 3/4” and ½” tubing.
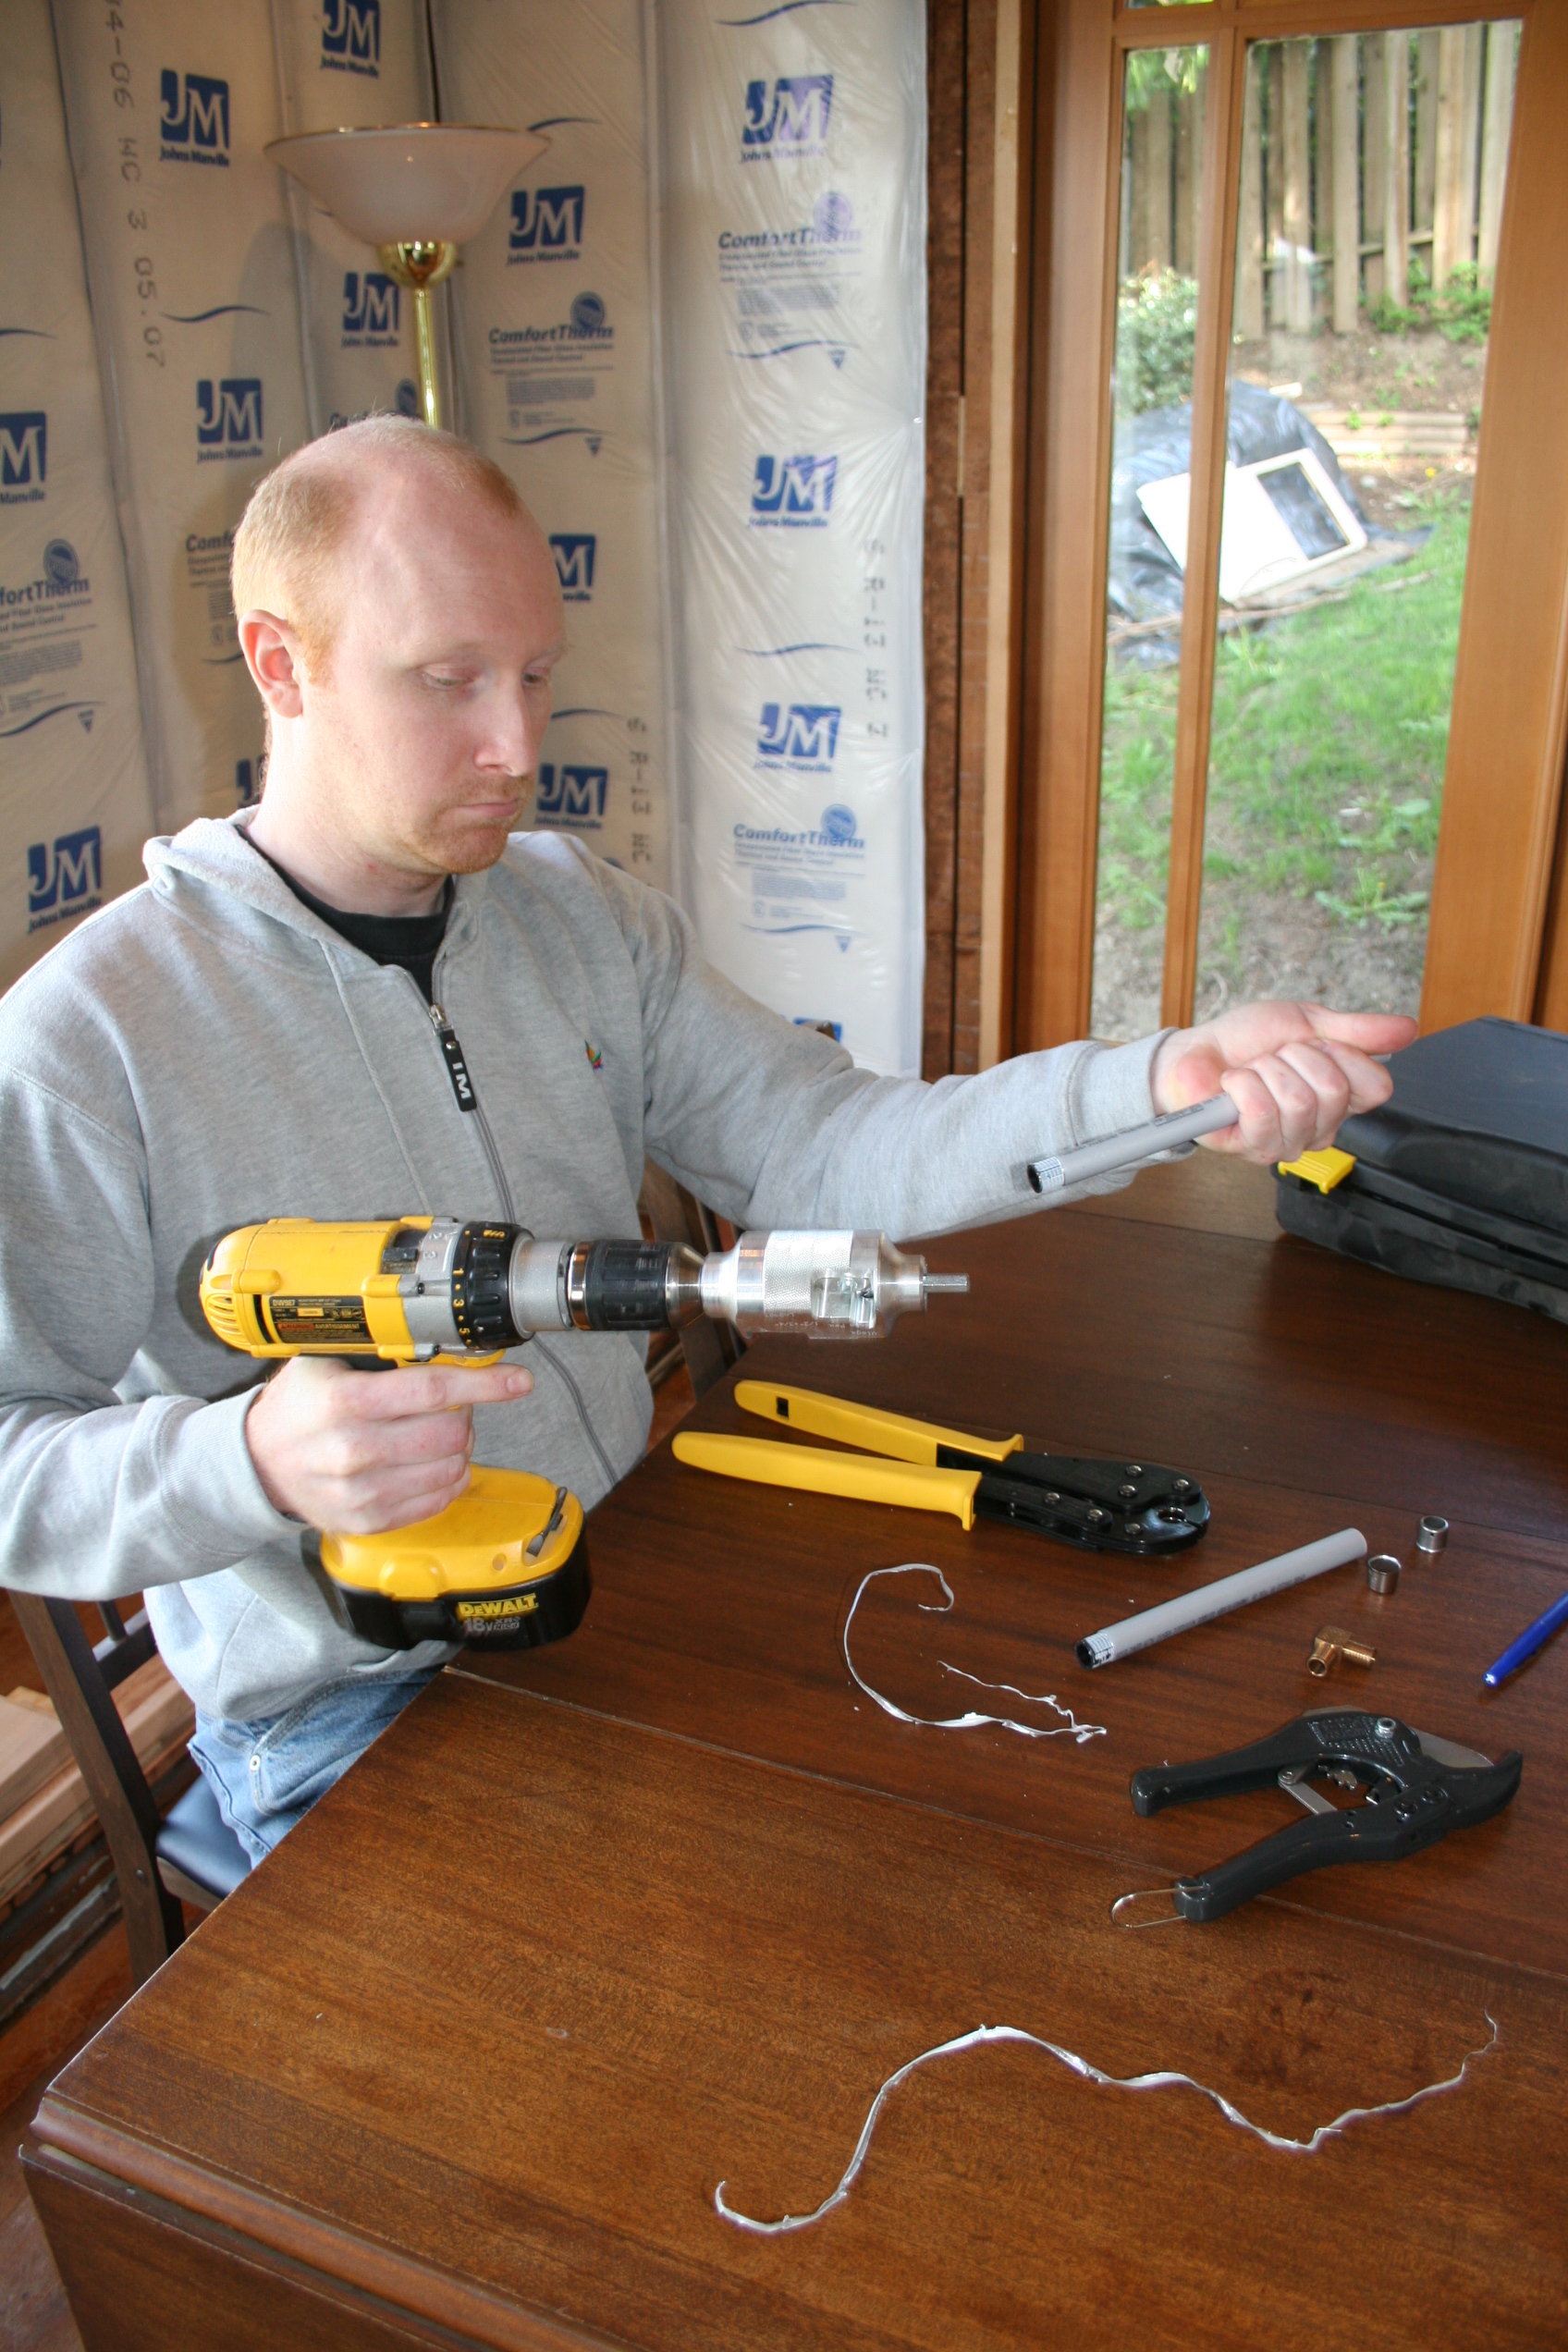
Now, to cut the tubing you just slice it with this $5 tool, which I was able to find at Home Deposit.
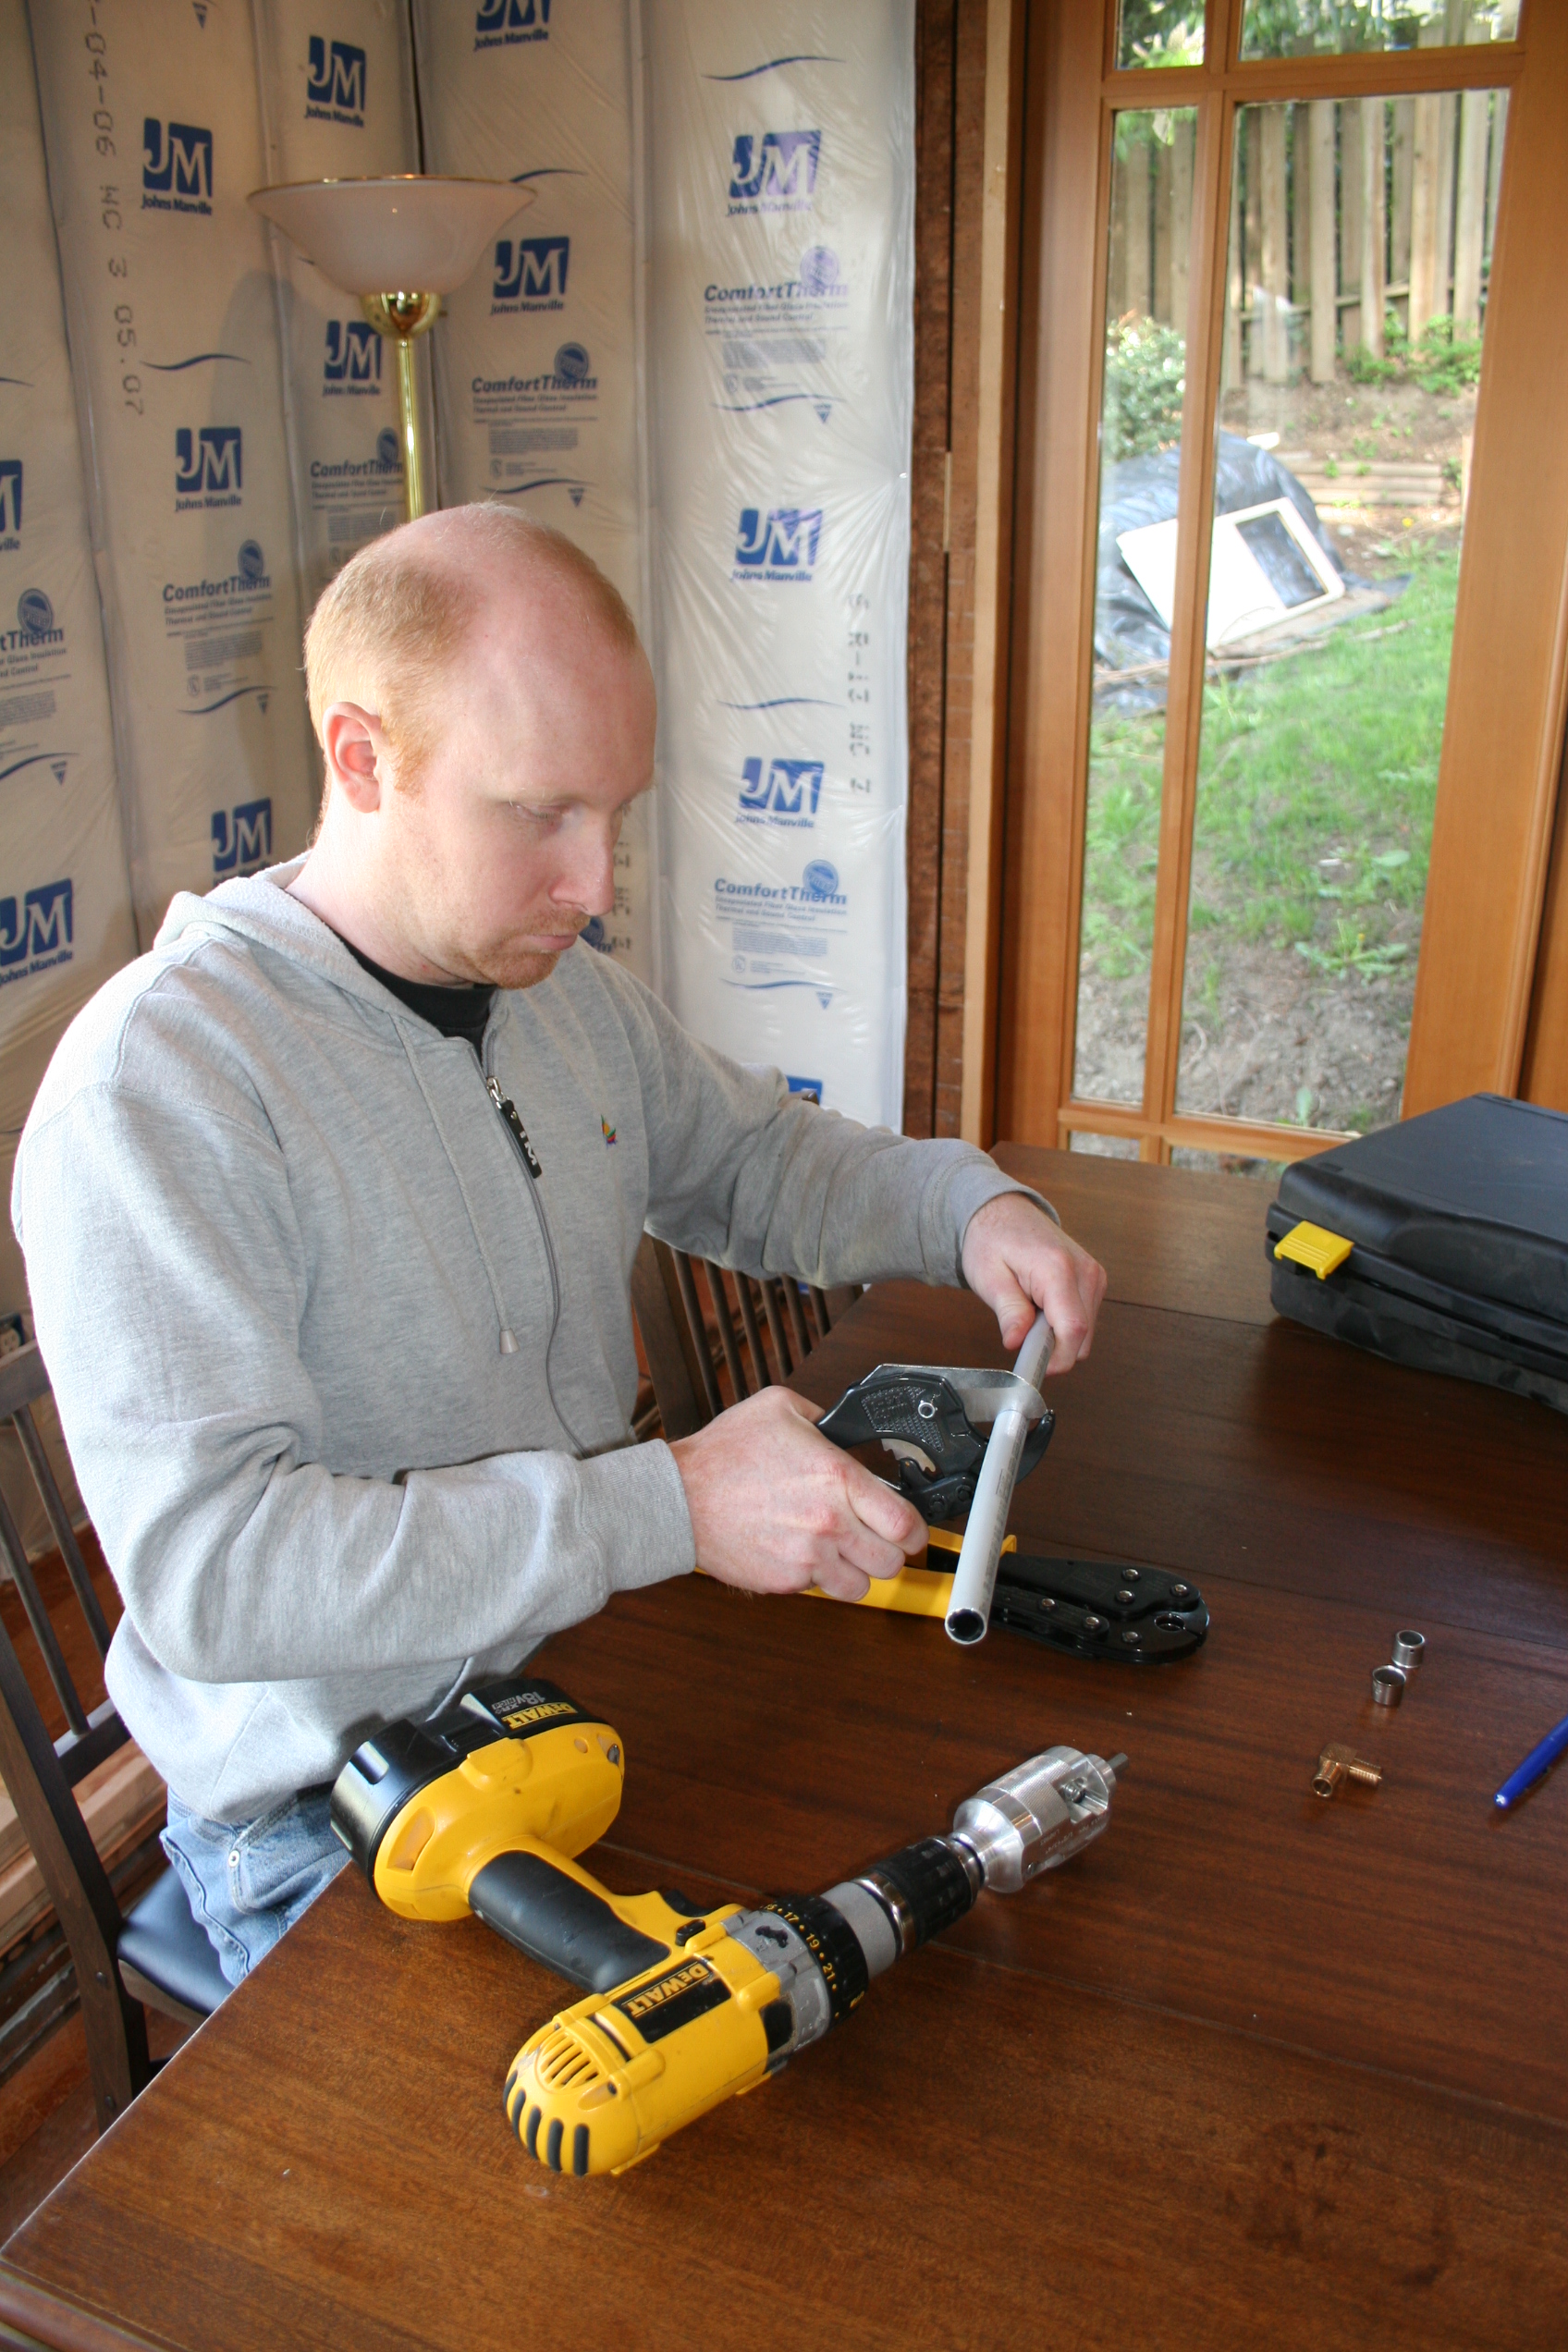
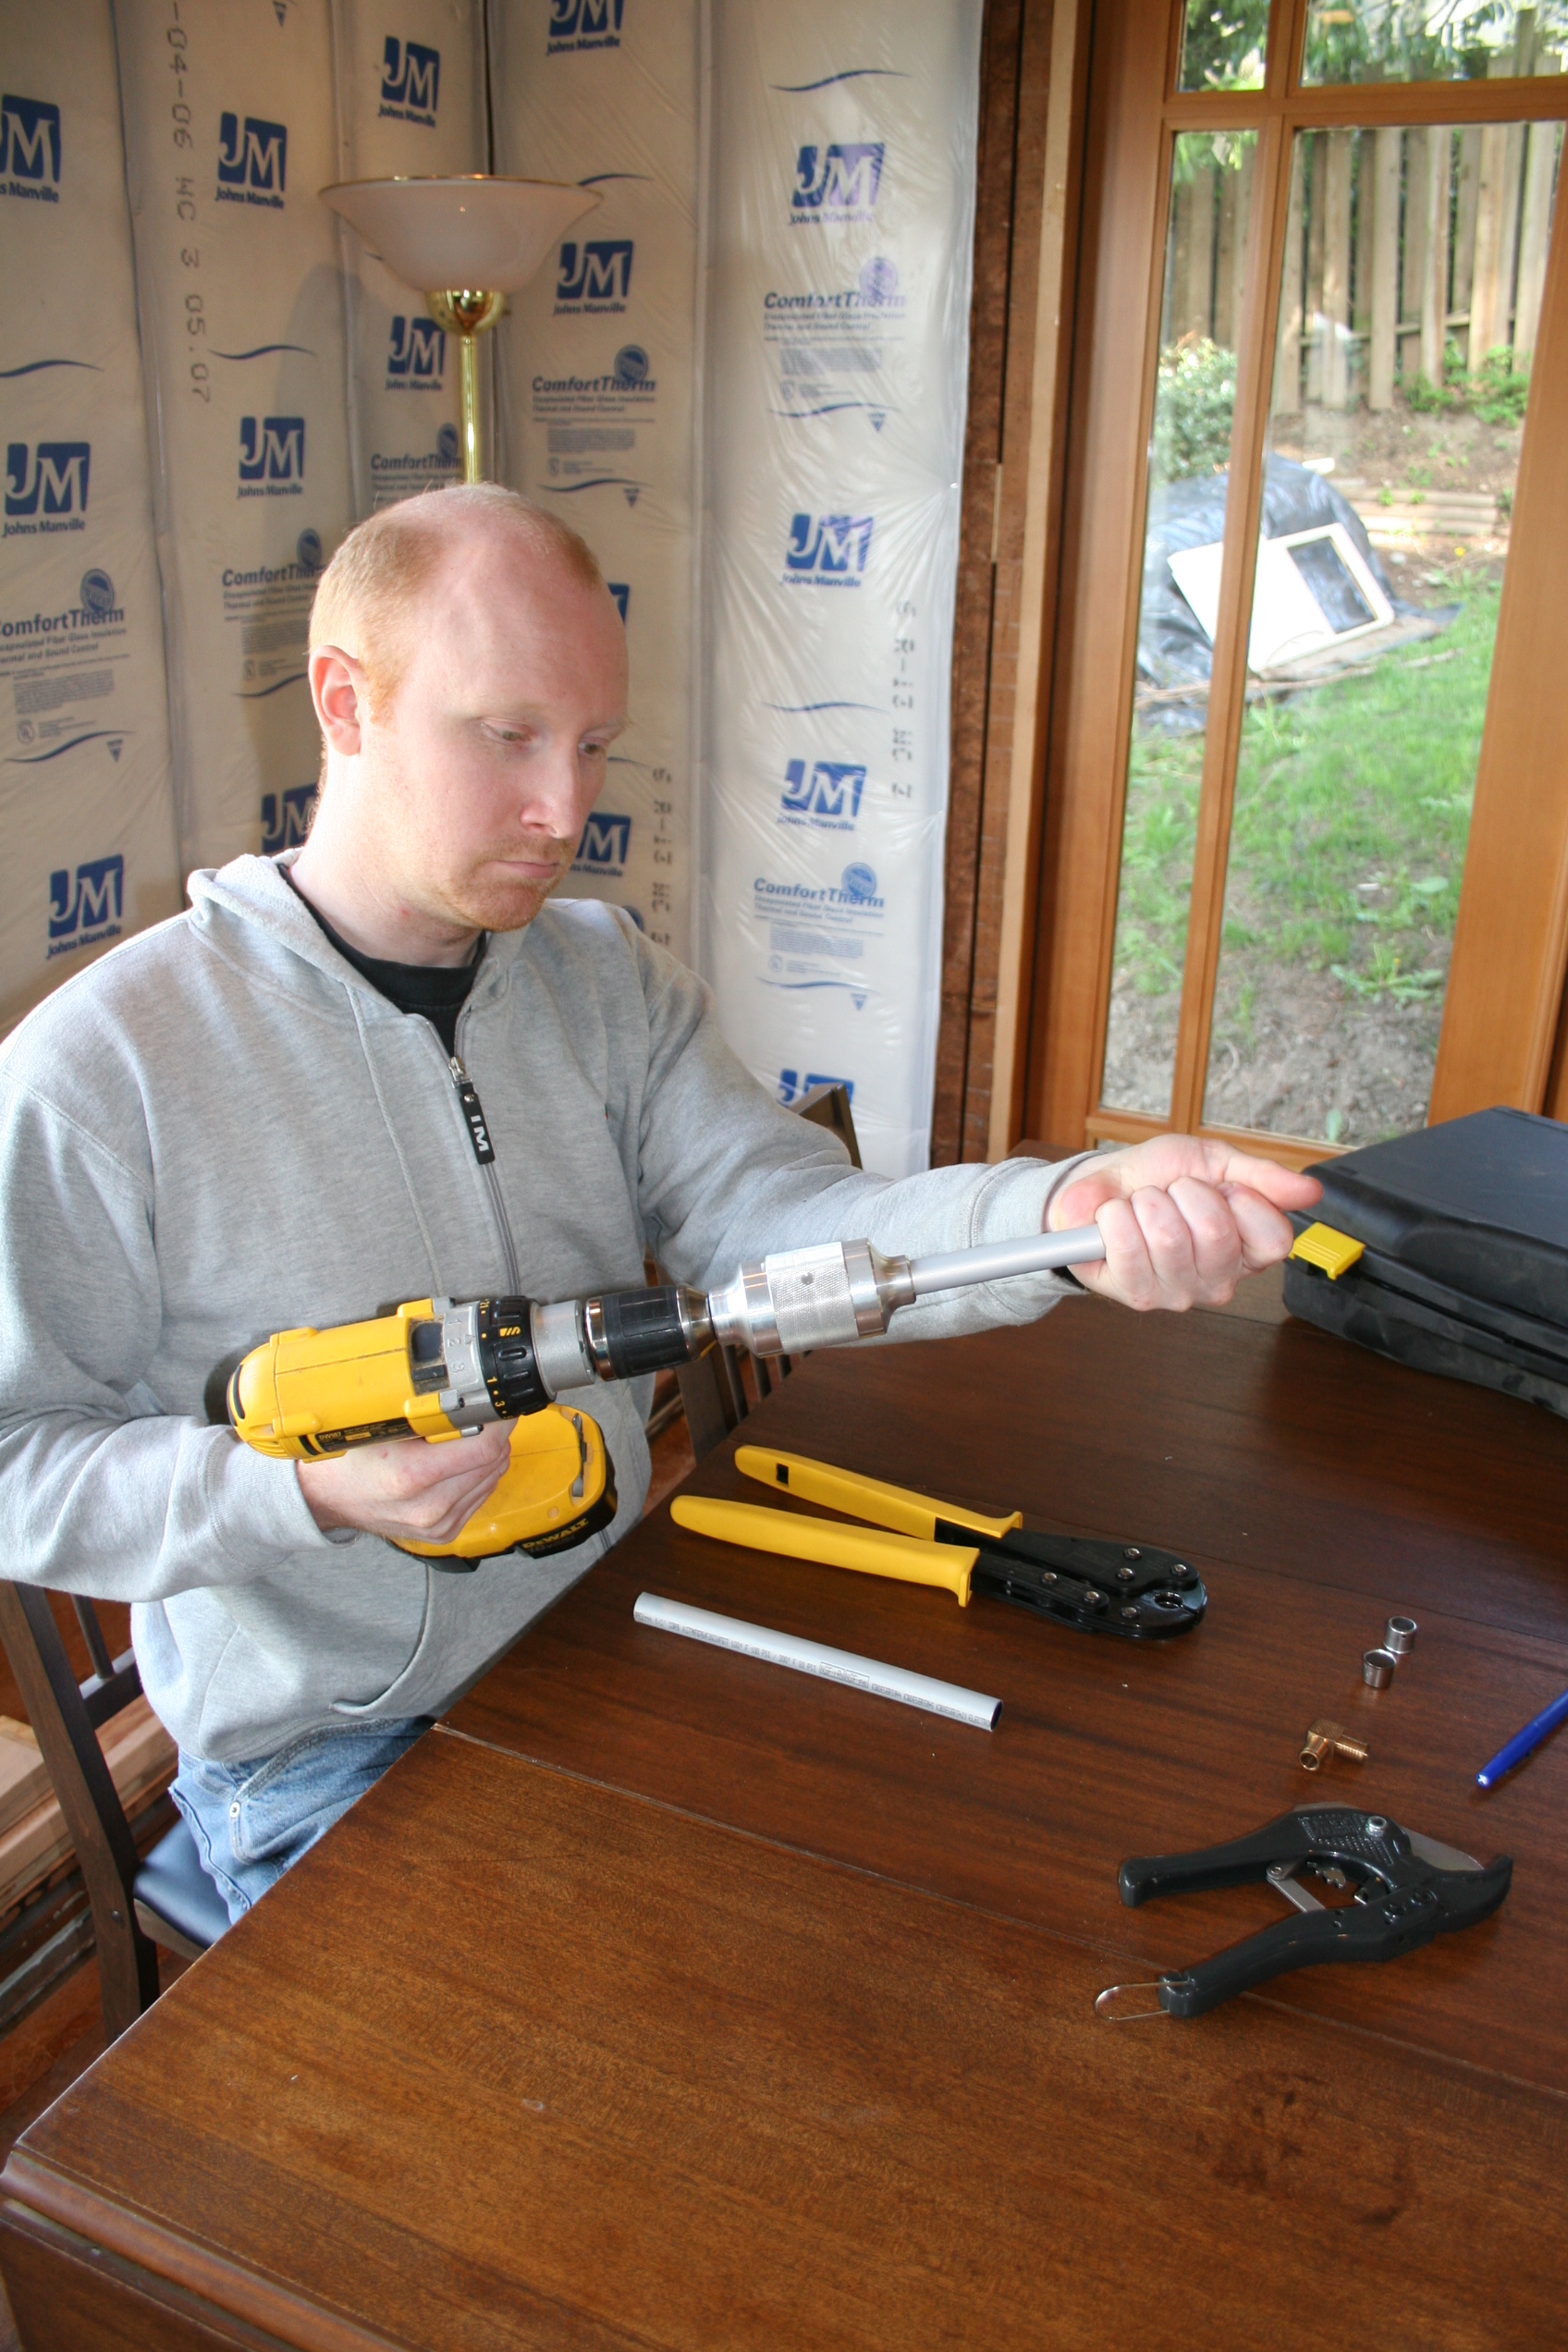
The tubing I have here is called “FostaPEX” (there are other brand names for basically the same stuff too). This kind of PEX has an aluminum sheathing which makes it hold its shape when you bend it. The aluminum also provides some insulating value. It may also act as an oxygen barrier, but I’m not up on the science. The point is, with FostaPEX, you have to first strip the sheathing from the end you want to crimp. This is done using this nifty device which is essentially an expensive pencil sharpener (it has a razor blade that revolves around the tube, stripping off the outer layer of aluminum and plastic.)
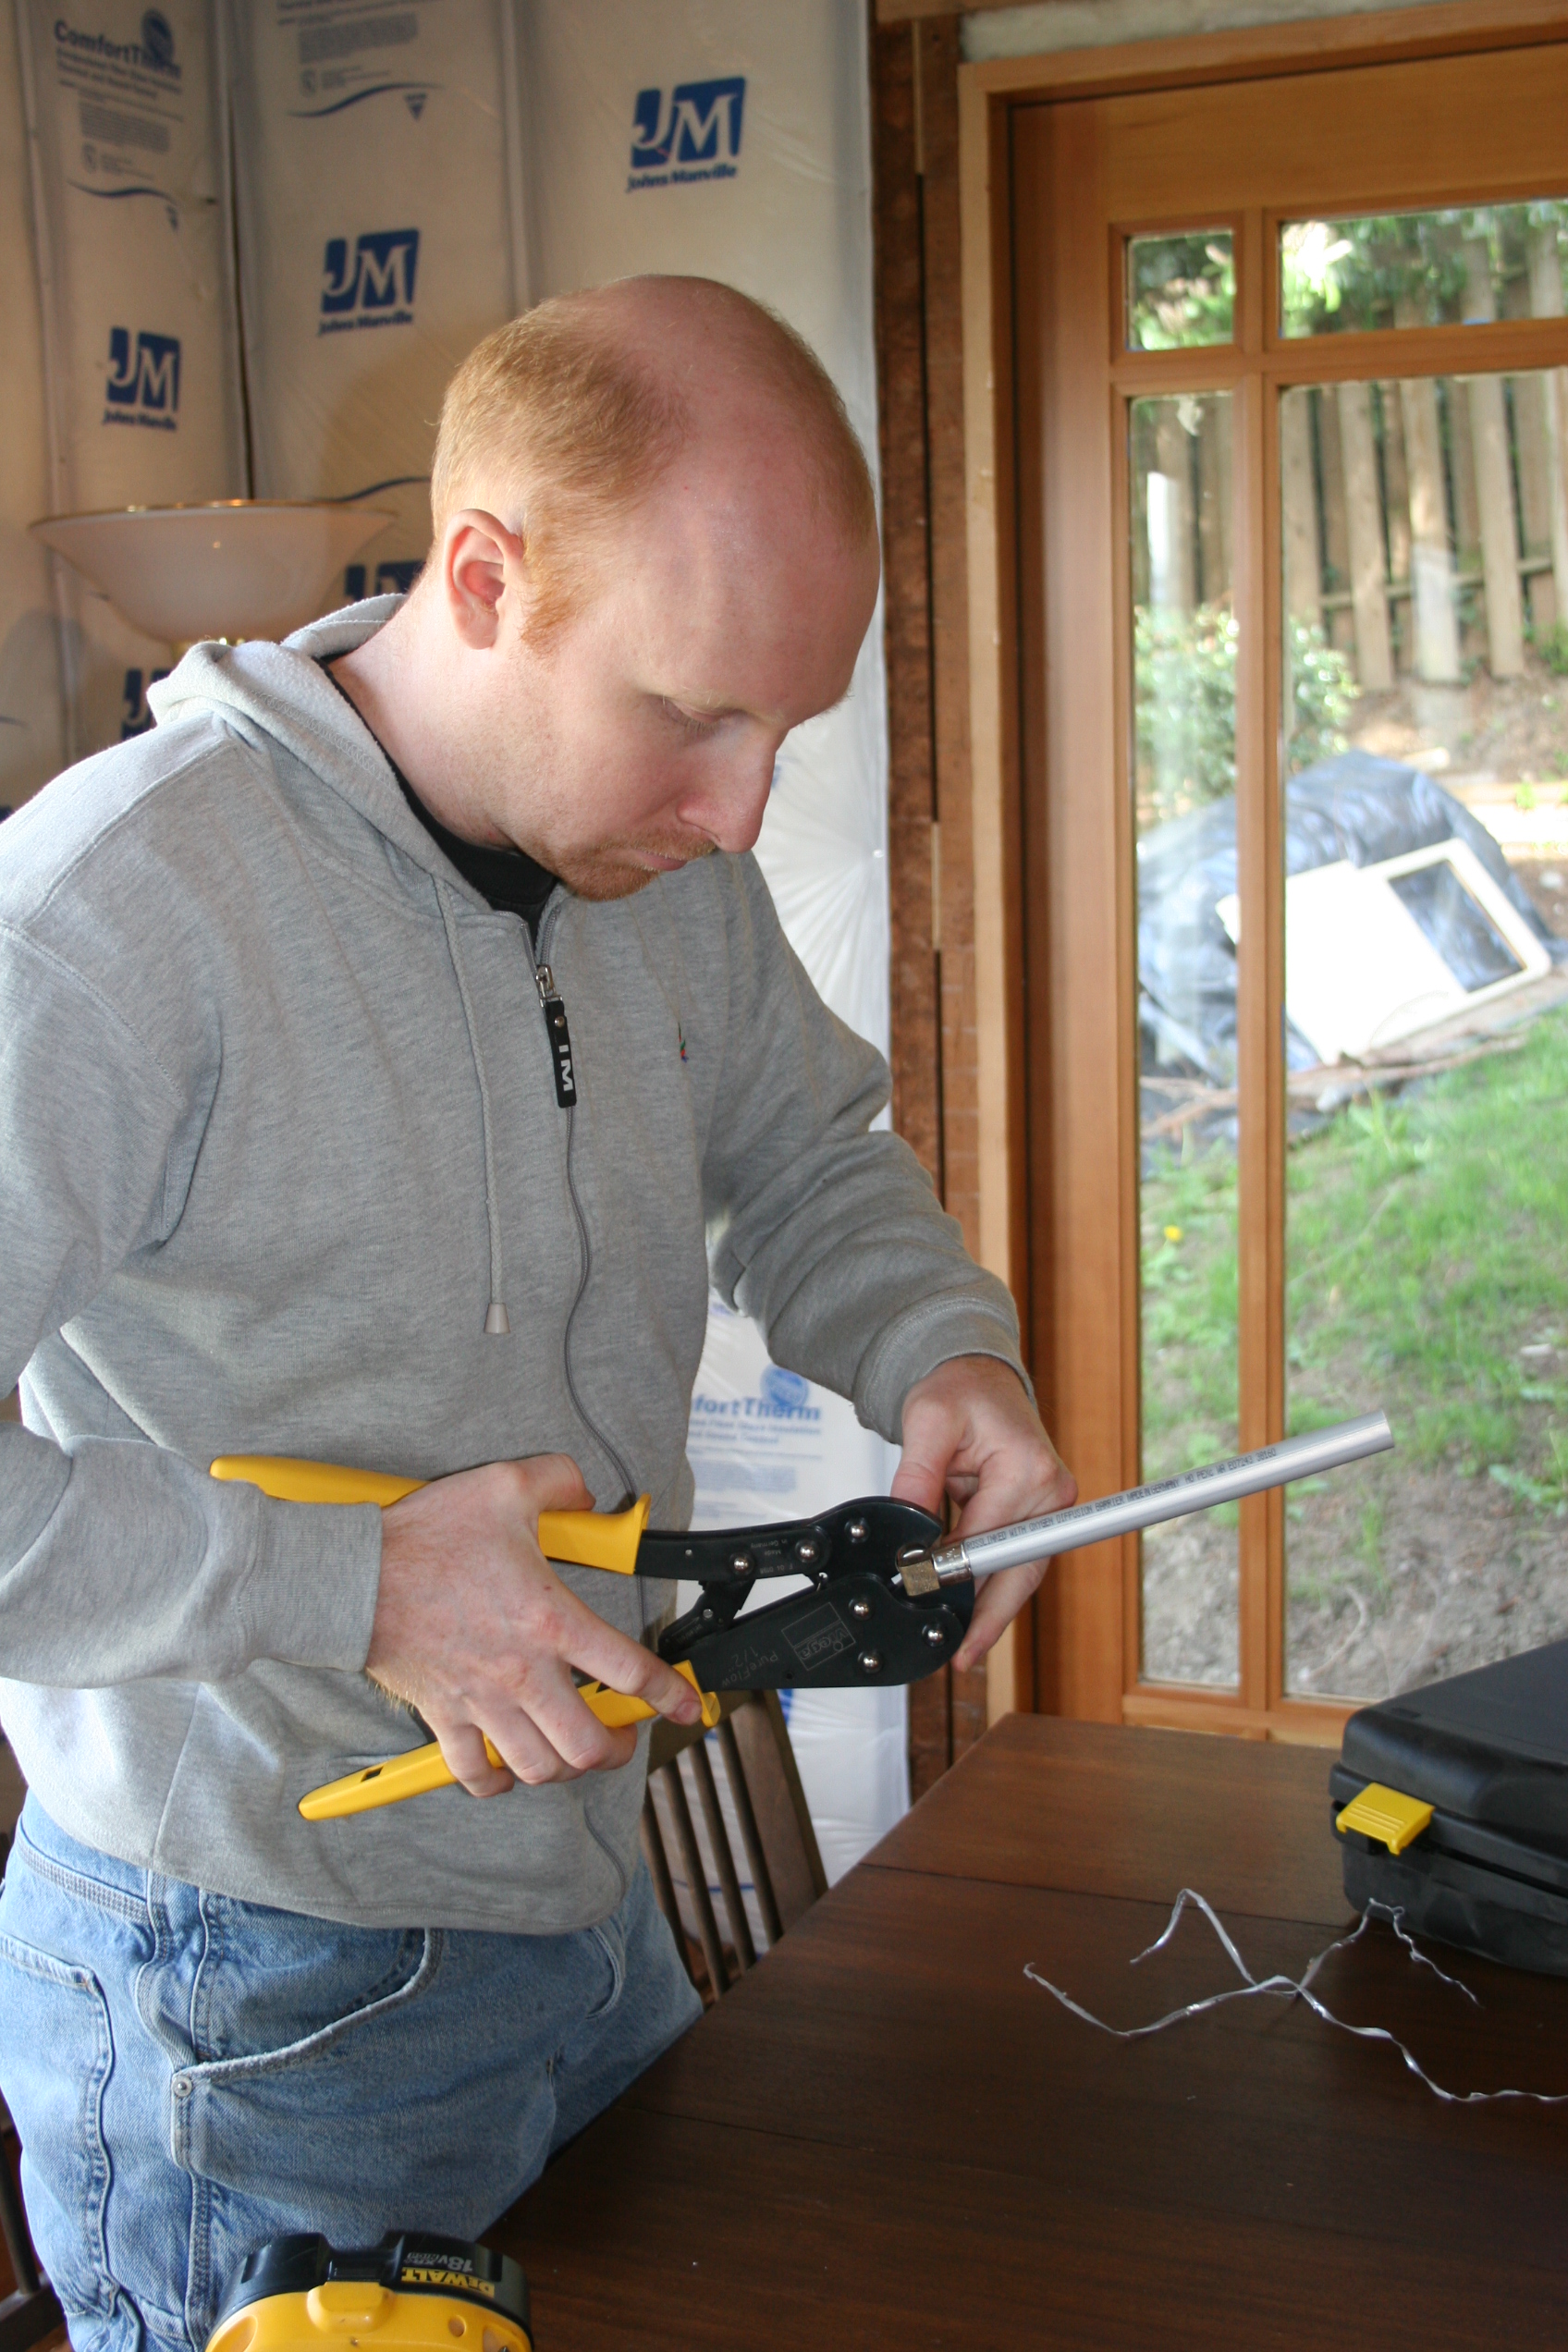
With the tubing stripped, the next step is to apply the crimp ring.
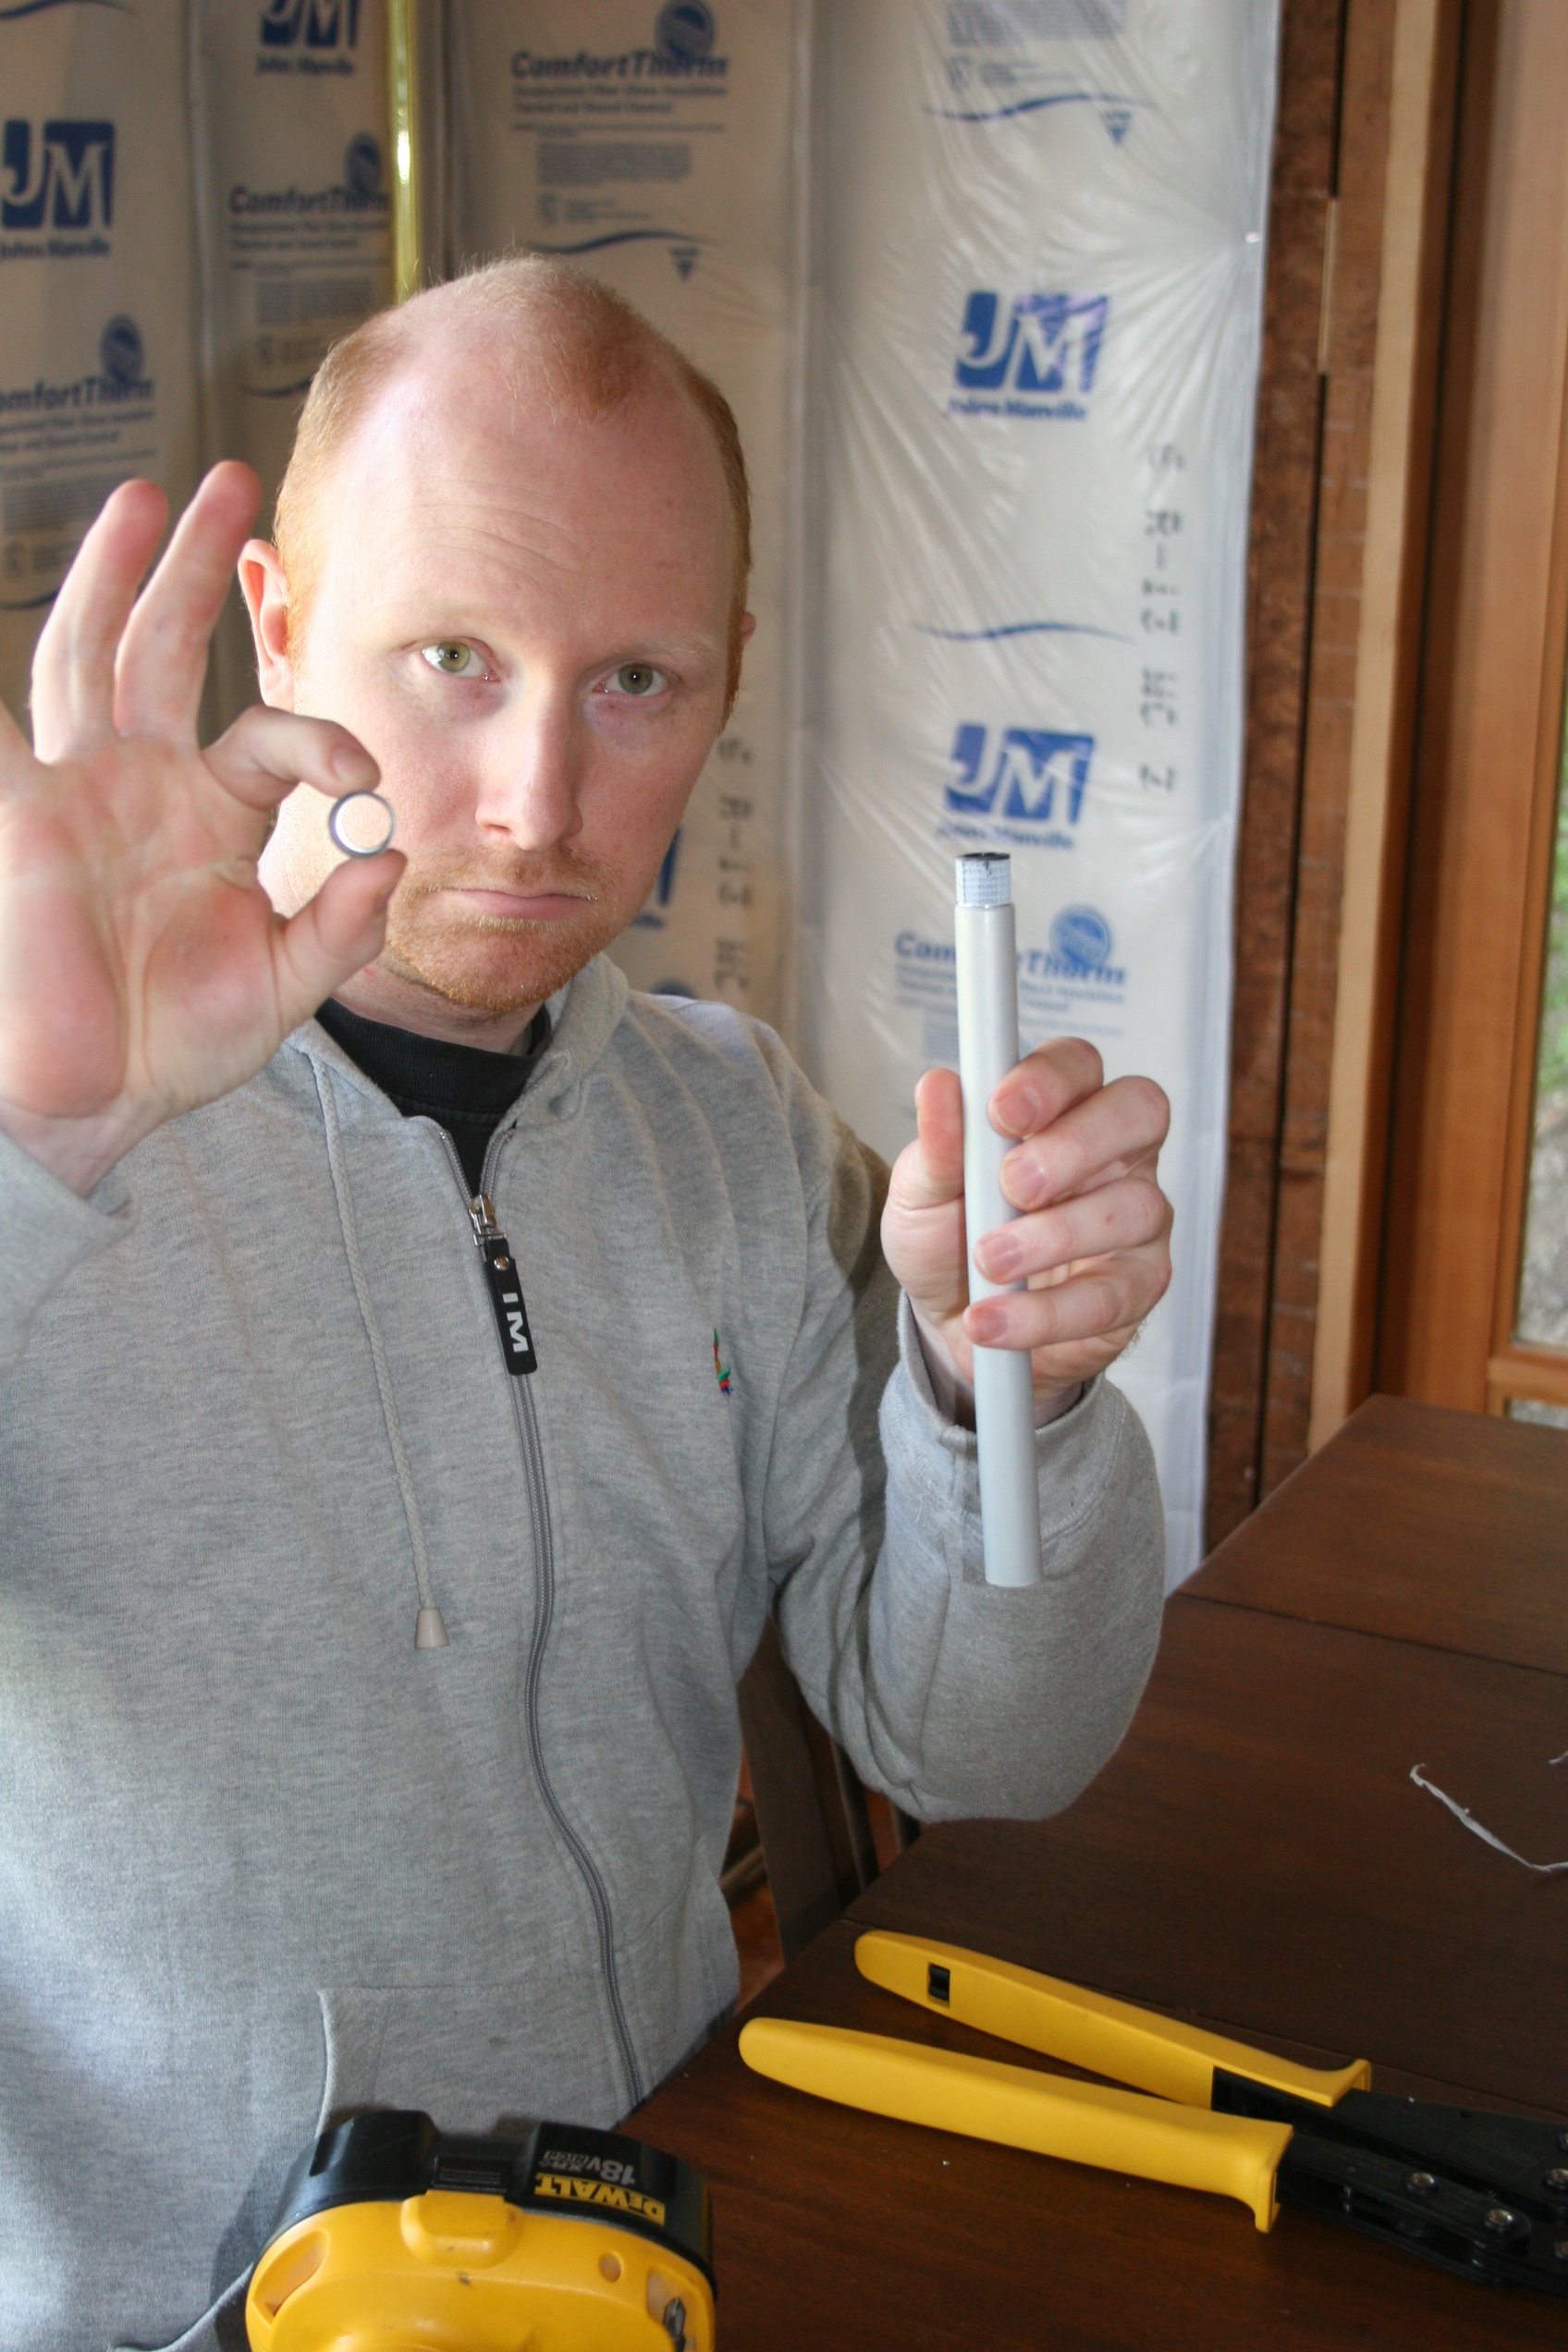

Then, insert the fitting. It goes on pretty tight, but not water tight!
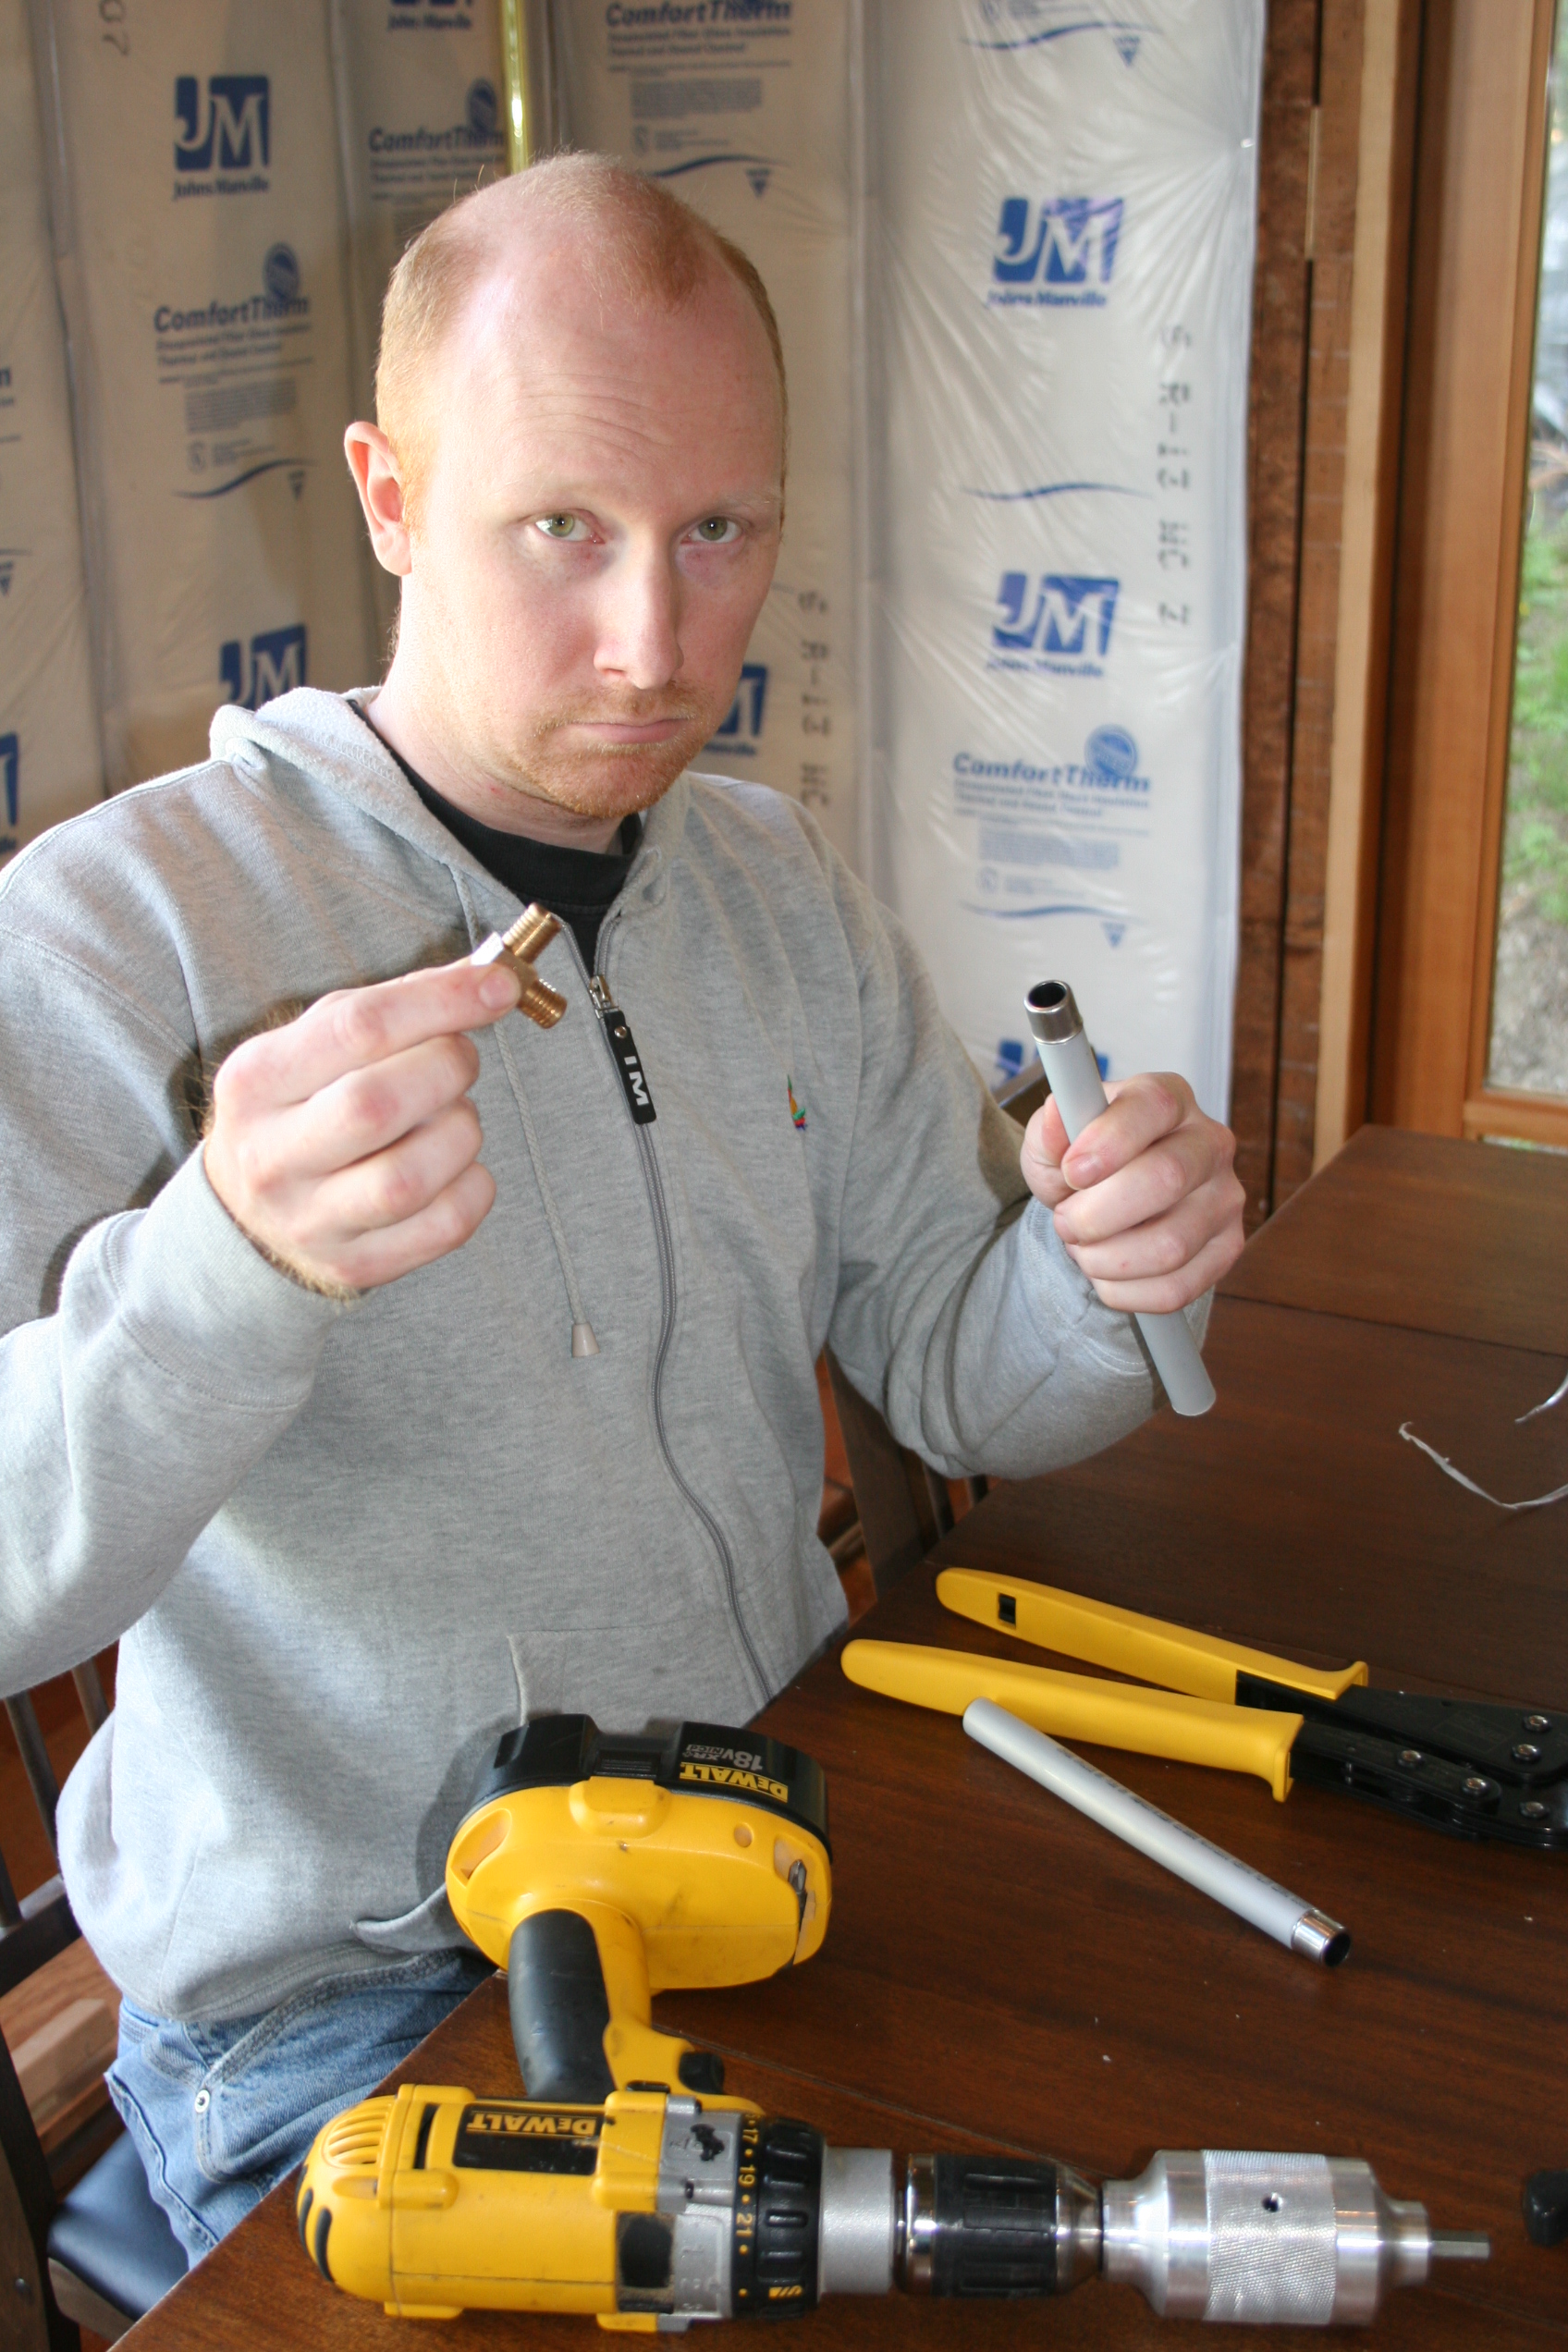
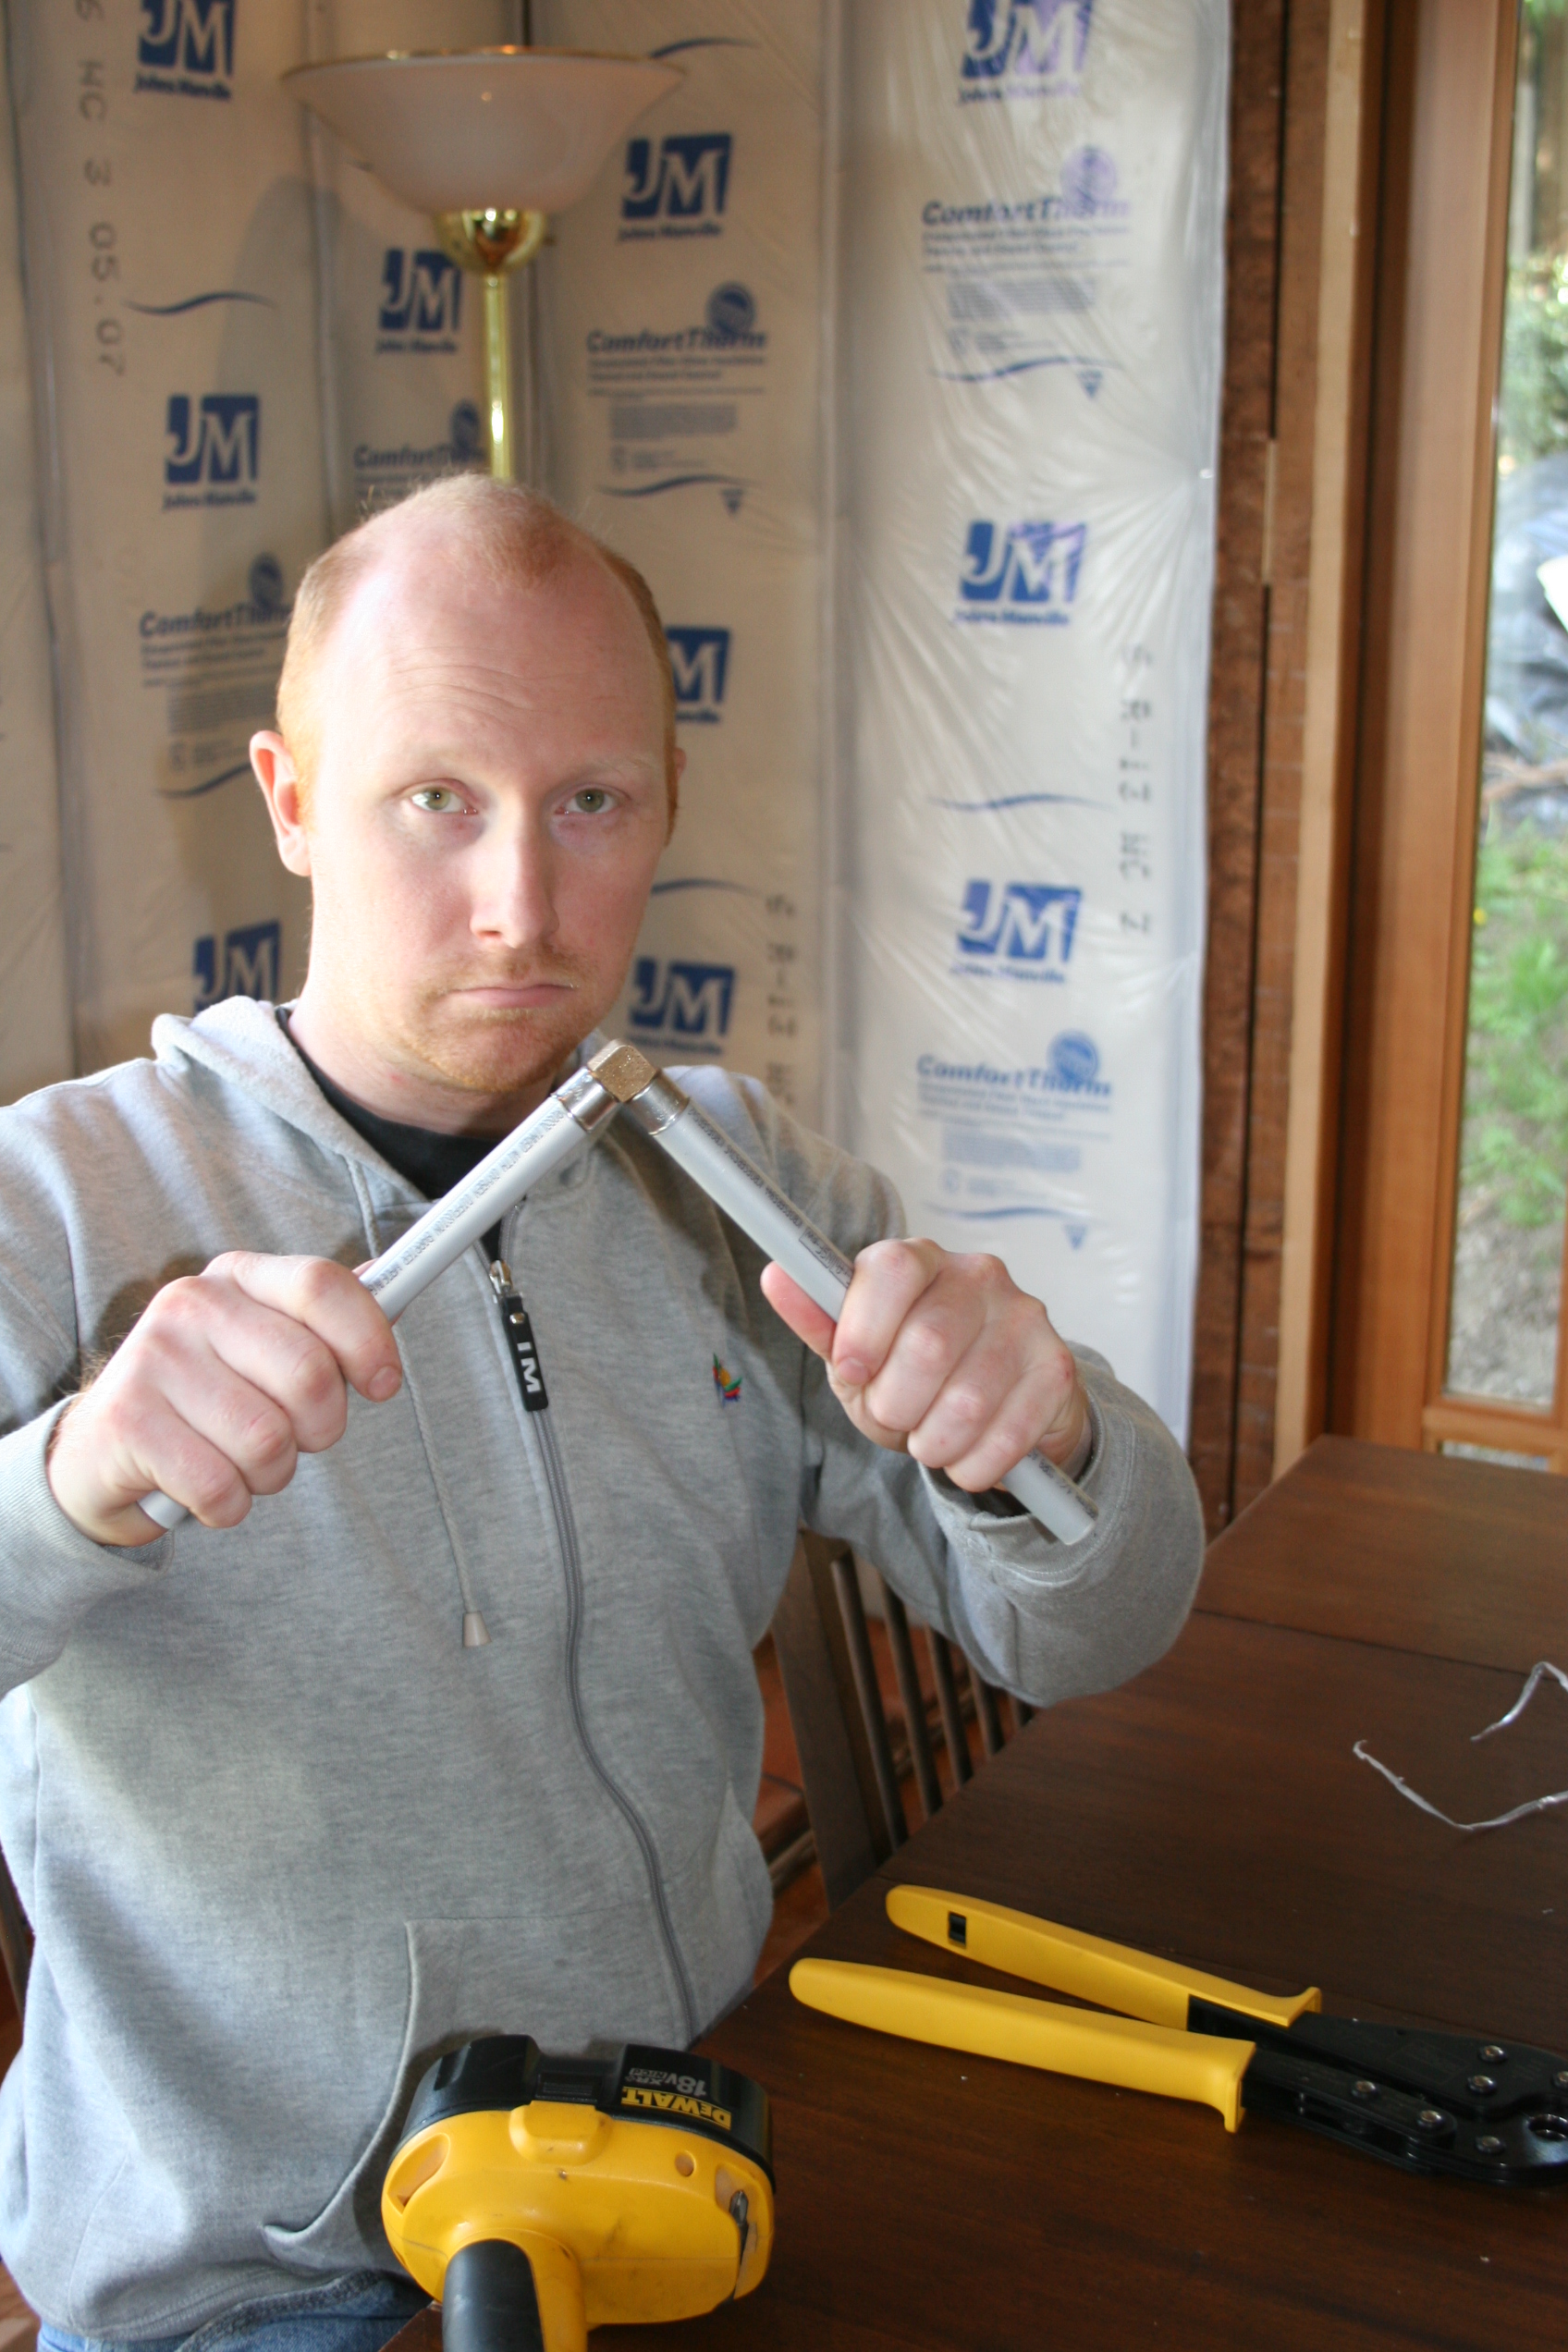
Repeat these steps for all the pieces that go together and make sure they’re all cut to the right sizes. You can basically “dry fit” your entire system before you make a single crimp if you want.
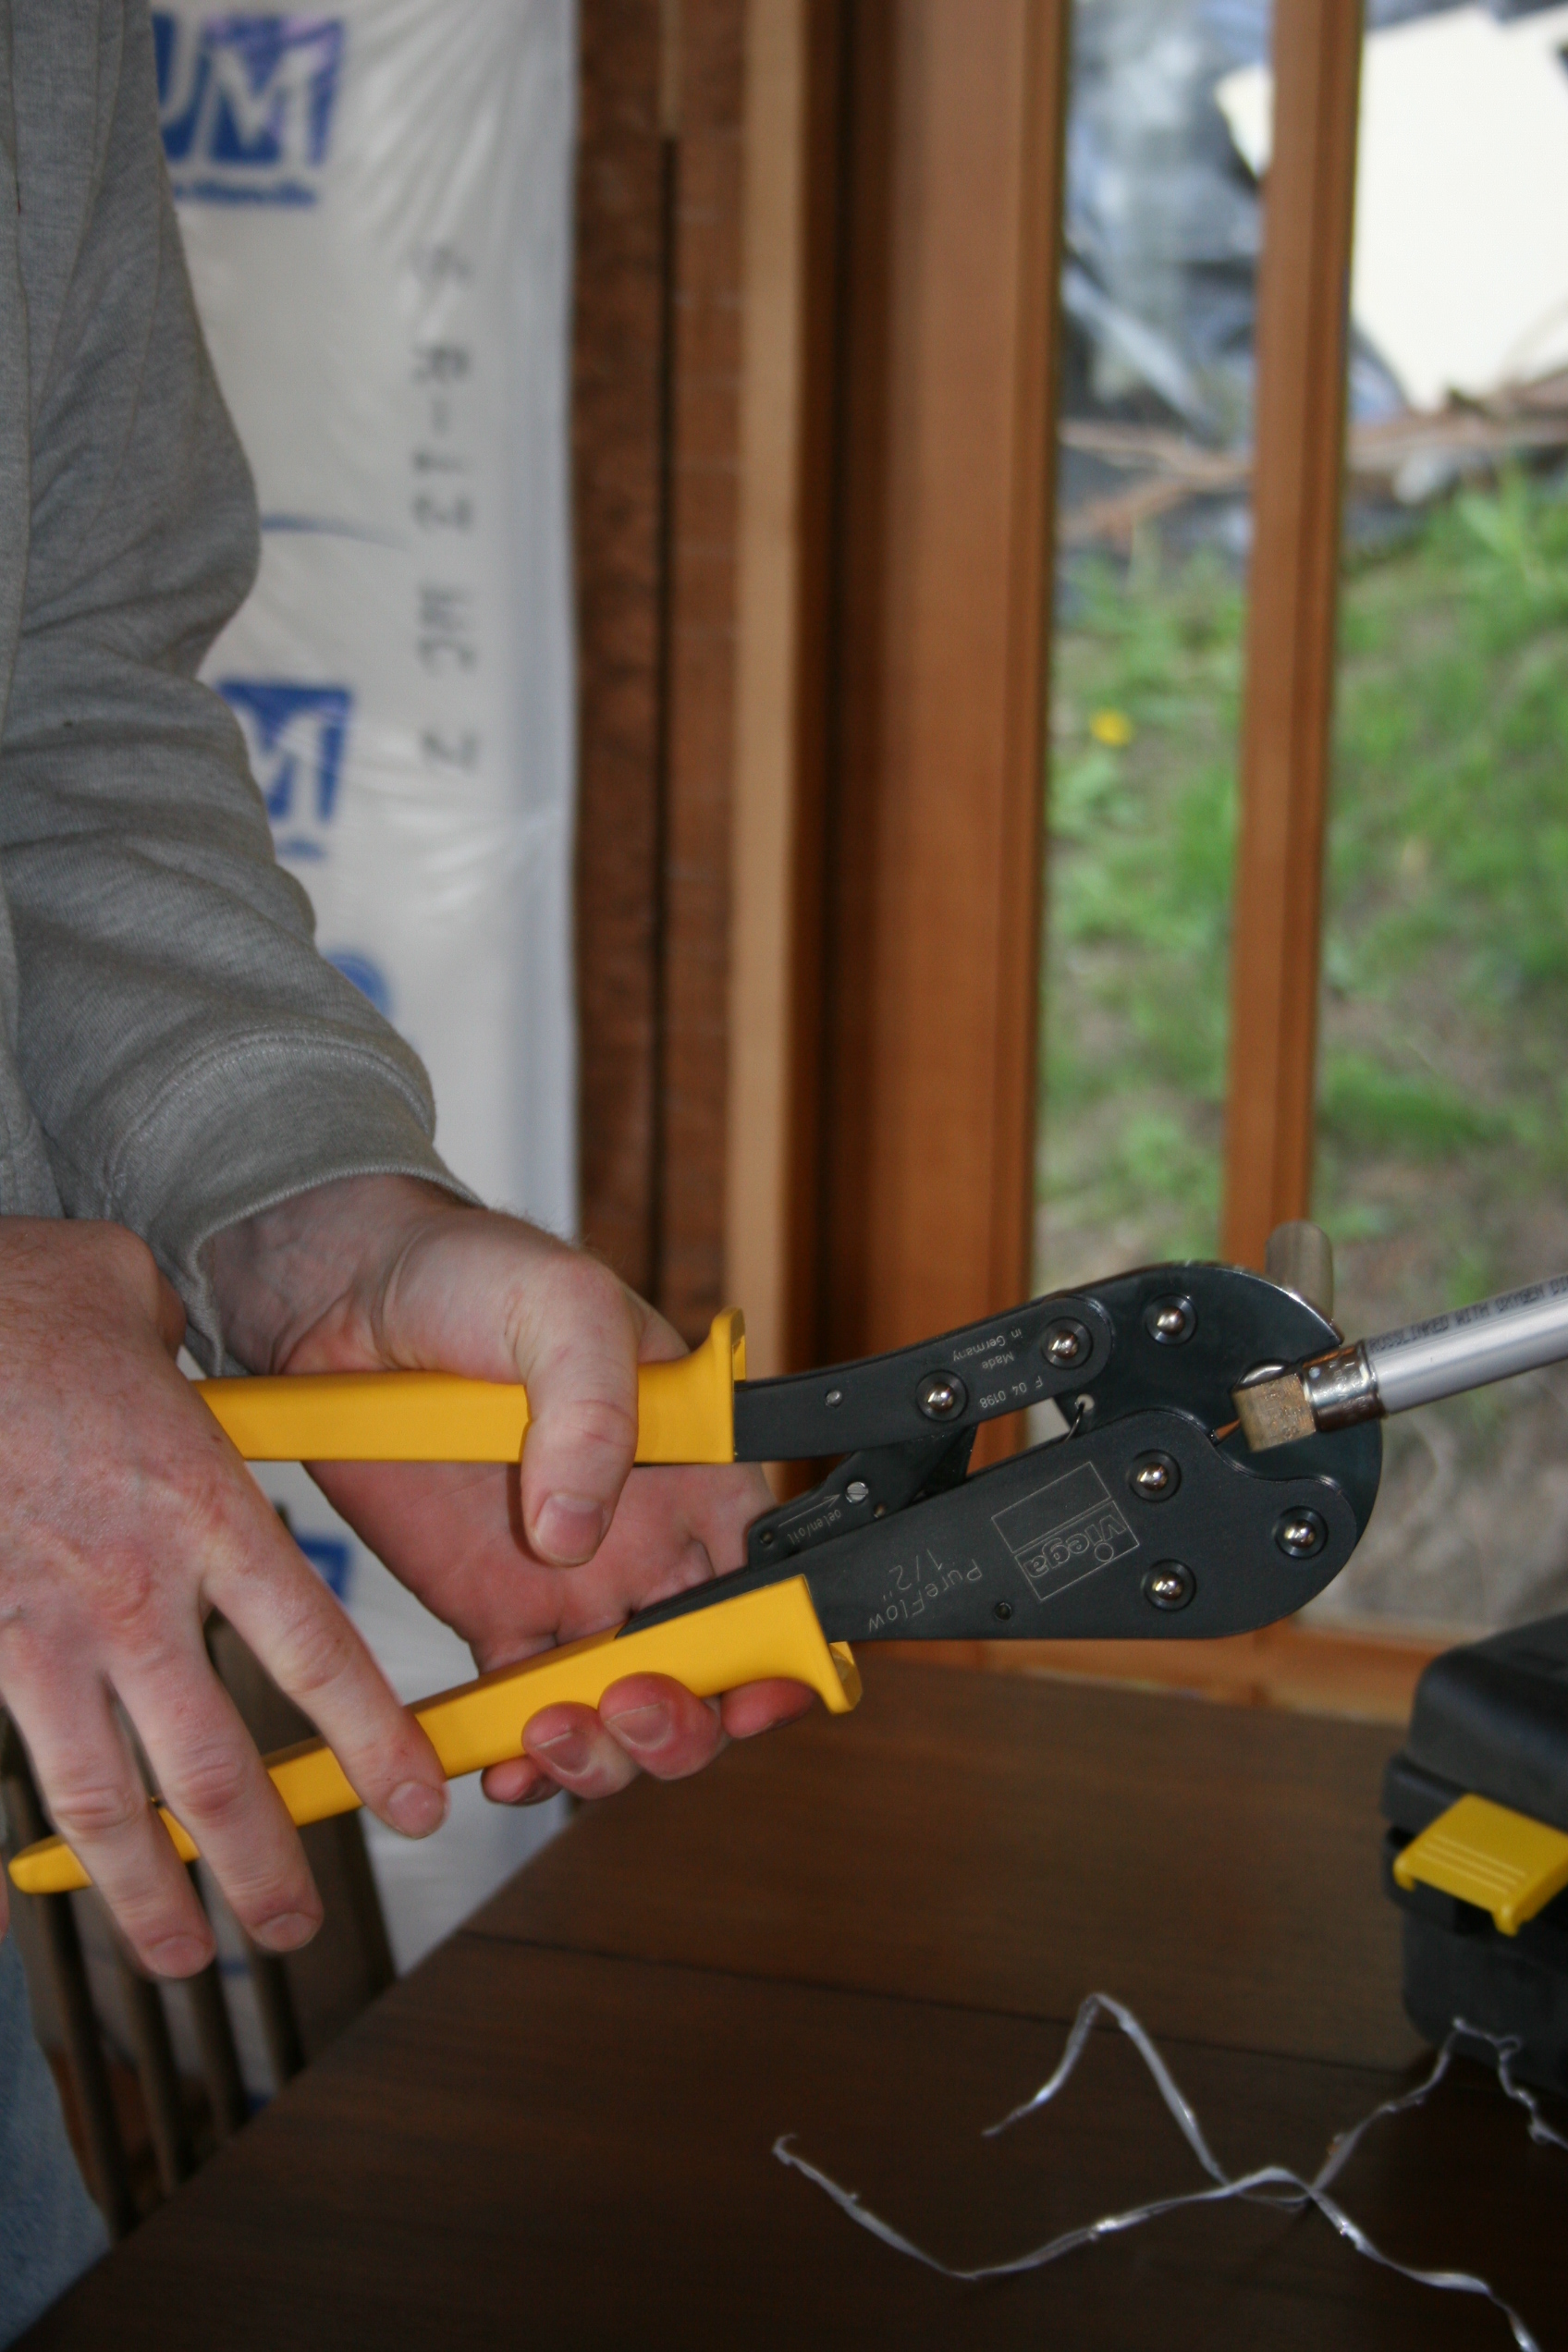
Now it’s crimping time. The tool has jaws that apply force evenly around the crimp ring. It’s important to center the jaws on the ring. Once you start the crimp the tool wont release until you’ve applied enough pressure.
This is what a crimped fitting looks like versus an un-crimped fitting.
All said and done, it’s pretty strong!
I should note that you can take a fitting apart and you can even re-use it. Using a blowtorch you can essentially heat the PEX which will expand just enough so you can wrench the fitting out using a pliers. I’ve done this a few times to save a fitting, which generally cost about $3 apiece. Yep, $3 – that’s a bit more than the $.19 a copper elbow costs at HD, but the time savings of installation and the fact that you dont need as many fittings in the first place makes up for this, IMO.
14 Comments
ben·April 19, 2006
thanks for the explanation. I’m trying to convince my wife to go wtih PEX. looks pretty easy.
homeimprovementninja·April 19, 2006
That’s a kickass tutorial. I was thinking of trying PEX on a future project b/c I’ve heard good things. I don’t know if I want to spend $300+ on tools though.
Greg·April 19, 2006
Very nice. I wanted to do PEX so bad when I replumbed but there are no retail places that sell it in the area. I thought about doing mail order but what do I do when I’m short fittings (and you know you always will be). Doing copper wasn’t the end of the world, but PEX would have been much easier. That is surprising the Home Depot doesn’t carry it.
Paul Pollets·April 20, 2006
PEX fittings and pipe will ultimately be found at the Home Stores. The manufacturer’s do not want it to become a commodity like copper, when they are still training plumbers and some stubborn building officials why the product is superior. In Europe, I found a wide selection of major pex fittings, Pex pipe and even wall panel radiators in the Home Depot in Heidelberg. Major manufacturers do not want to be accused of selling HD and abandoning the HVAC contractors’ discounts and loyalty. Give it a few years…it will be a commodity.
Lisa Neal·December 2, 2006
Your tutorial was the best! I have a house with two (of 3) bathroom sink hot water supply lines that have the valves abandoned—with PEX tubing run from somewhere (no answers from previous owner) to the fixtures. The installations don’t look too great—but I’m not a plumber or DIY’er. If I send you pictures, would you give me your opinion if it looks okay? Since you’re the best site on the internet, I would appreciate your imput. Thanks, Pam
Plumb Bob·December 8, 2006
Both Lowes and Home Depot in my city now stock pex pipe and crimp fittings. I was unable to find PEX when searching their respective web sites to compare prices before driving to the stores, though. Naturally, each one is lower on some fittings than the other, so you must comparision shop at one, write down the prices, and then go to other store. Buy the fittings there which are lower cost, then go to the service desk and get a price match on the fittings which were higher for the most savings.
Nick·December 10, 2006
Wow, that’s great Plumb Bob. I did see that Lowes in Seattle was advertising crimp fittings and PEX. Are the systems each sell the same, or different?
Michael·February 2, 2007
Not only does my local big-box have all the PEX stuff (and they have for years), but my small “mom & pop” hardware carries a full line as well. A combination crimper with 3/4, 1/2 and 3/8 as well as cutter can be had for just under $200. The real trick is getting a decent manifold. Zurn has some nice copper ones, but no one wants to stock them for retail…
Geoff Crawford·May 29, 2007
Thanks for the info!
Don’t ask, but I was using PEX on my truck… I paid $10 CAN for 10 ft of 1/2”, and had the local mom and pop place crimp the fittings on for $10 bucks—8 fittings plus their labour. Not a bad deal!
Duane Nickull·September 4, 2007
Thank you. This is a great tutorial. We are doing our upstairs plumbing now and I am going to make the switch to PEX. This convinced me.
D
CW·October 23, 2007
Maybe its just a recent update - but the local Home Depot and Lowes now carry the fittings and tools. I think its becoming much easier to find.
ps - nice article
Jim·November 22, 2007
Great article. During our replumb last year I watched the plumbers installing pex plumbing and immediately realized that I had made a mistake not doing this myself. To me this is a simple process than sweating copper and probably cheaper now too.
trey·July 15, 2008
You should look at some newer fittings I used to remodel my home. They are called “sharkbite”. Home Improvement box stores are now carrying it. The fittings are more expensive than typical crimp connectors, but they don’t required special tools (crimp rings, crimpers for ever size, etc.) and can be reused again and again.
guadalupe.je02@yahoo.com·February 12, 2011
PEX really makes plumbing easy! Add that and this article together ends up with a new light and perspective on plumbing, which is fun, fun, fun! Great post!