Vacation – Day 1
I’m on vacation this week with the intent to work on the house. Yesterday was Day 1, and I got quite a lot accomplished in the kitchen.
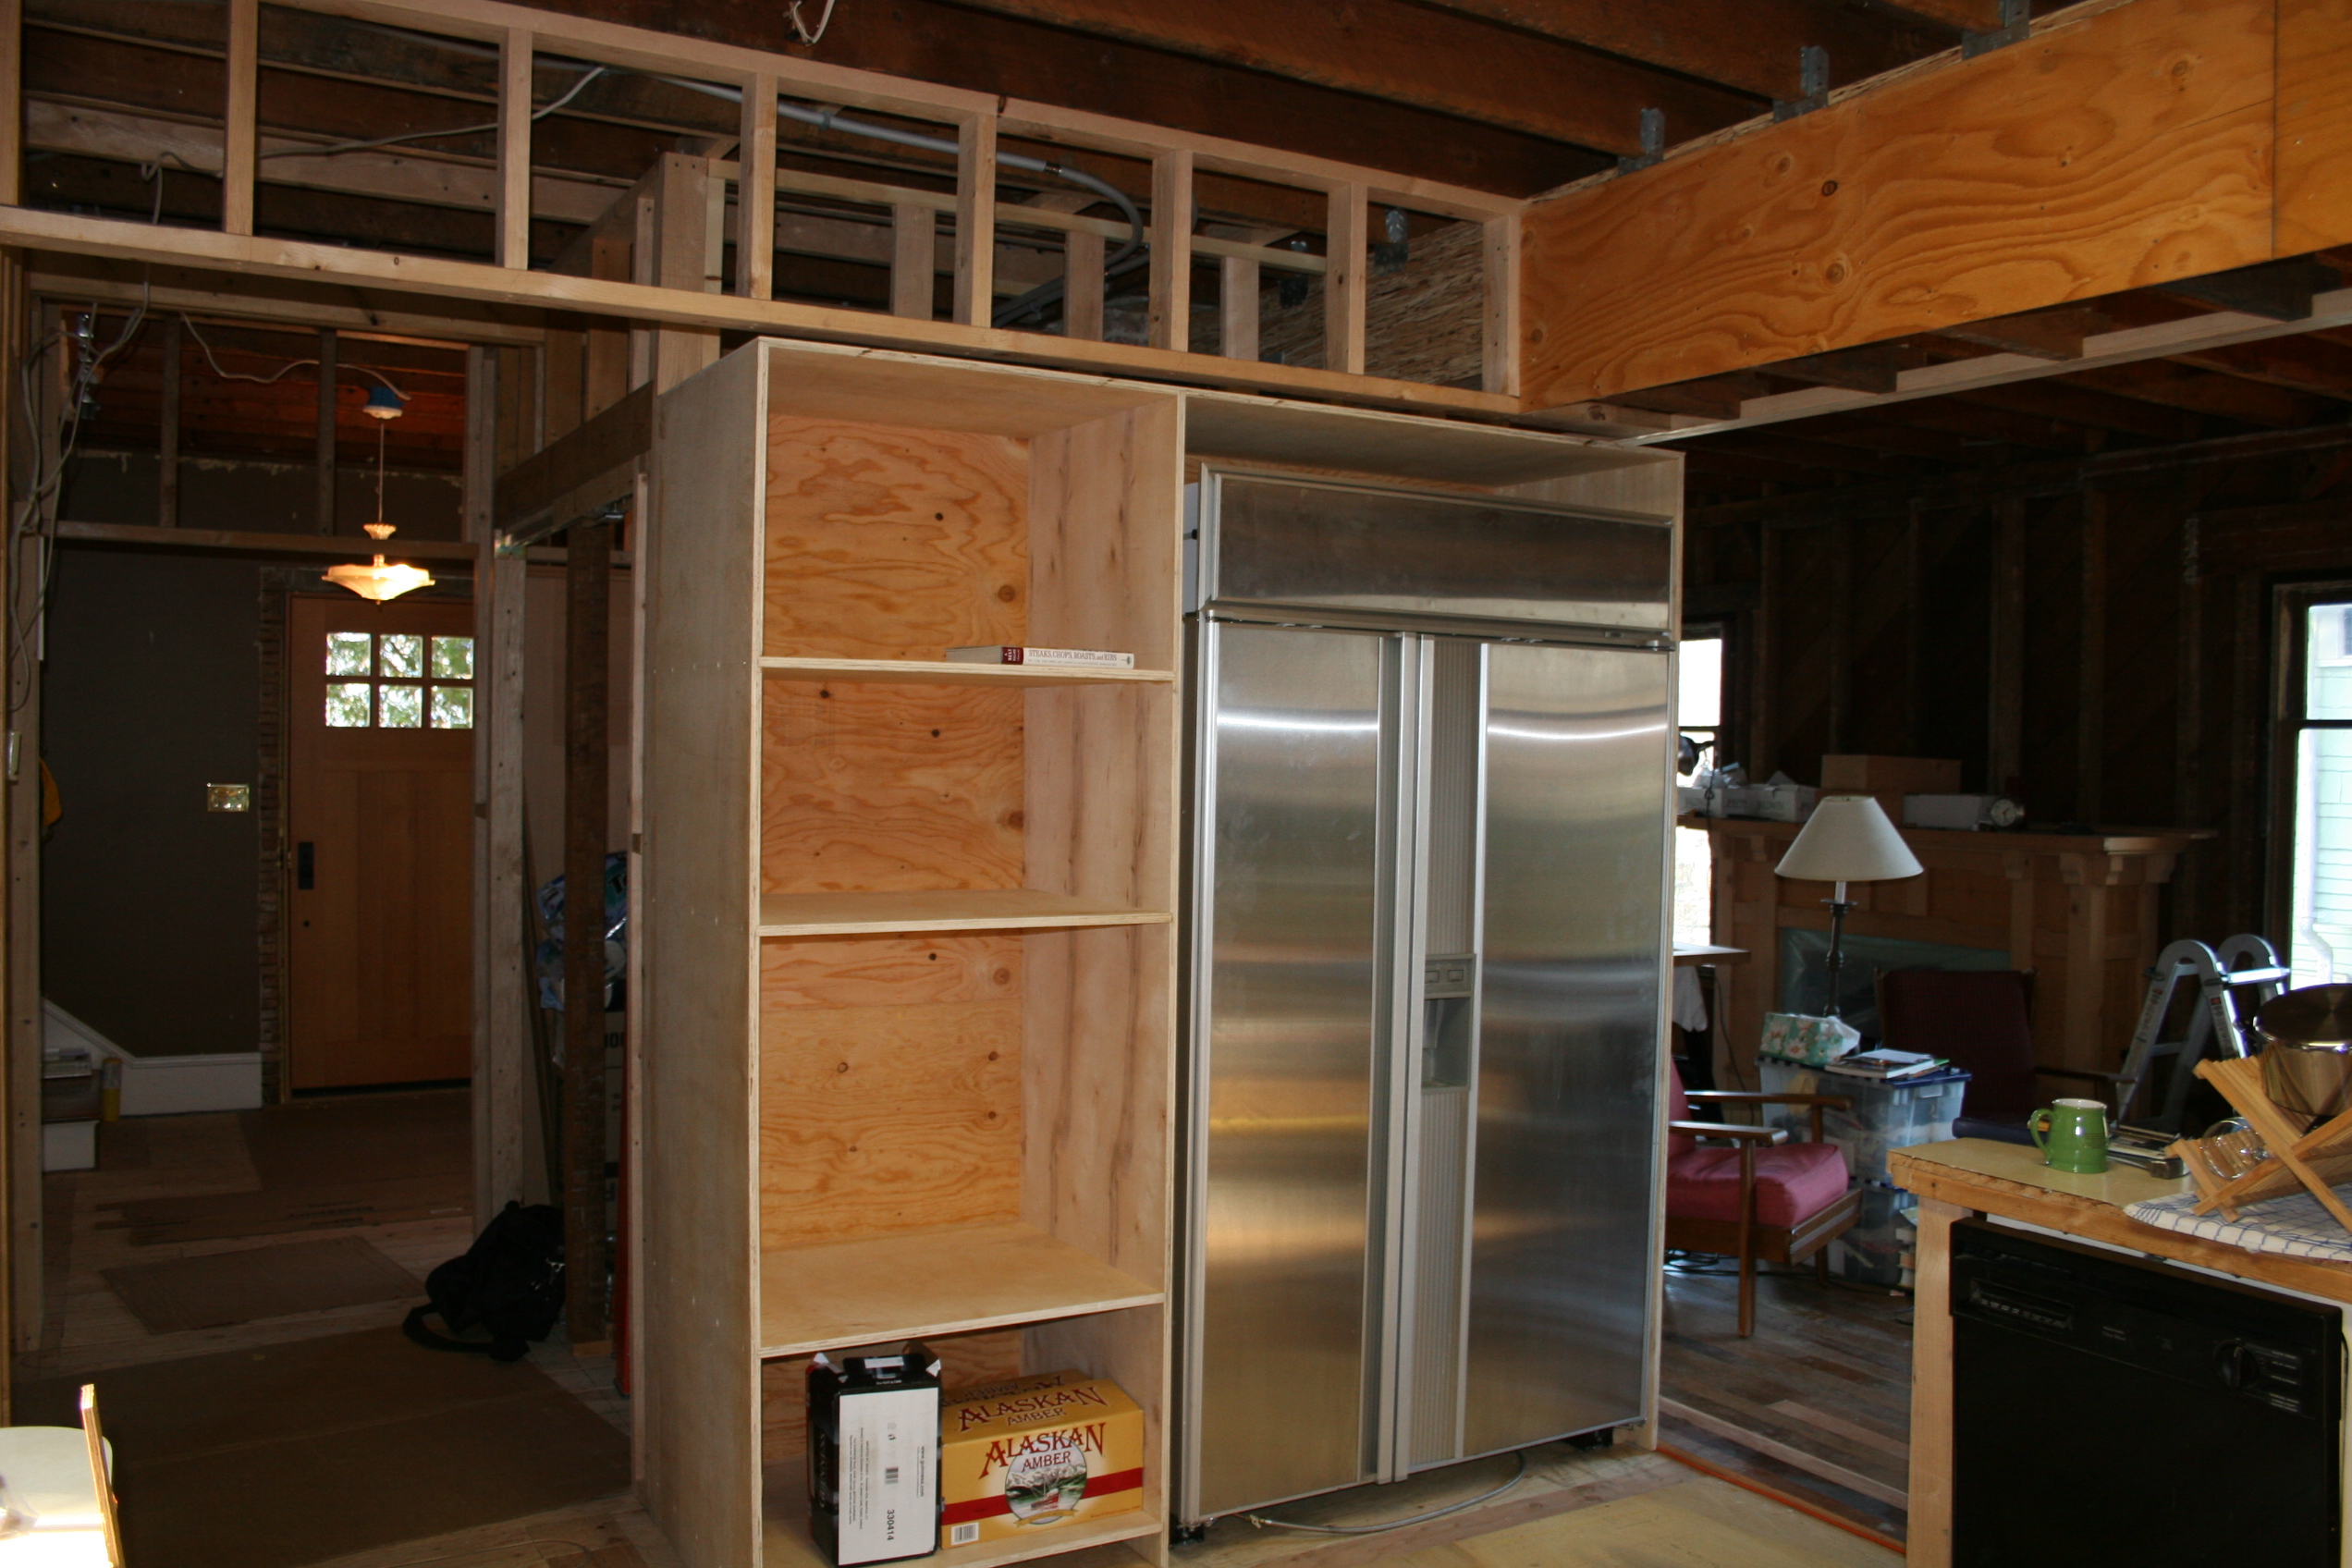
One of the features of the new kitchen design is a “wall of appliances”. This wall is really just a large built-in cabinet that houses our salvage-yard 48” Sub Zero refrigerator, an as-yet non-existent wall oven, and the microwave. There are two deep storage drawers and some overhead storage too. The unit is almost 7 feet wide and about 7 feet tall – it’s big. The backside actually forms the wall of the half-bath we’re adding.
I bought all of the supplies for this project at the HD on Saturday: Three sheets of 3/4” cabinet-grade plywood for the sides and shelves, and 2 sheets of 3/8” sheathing for the back. I was going to by lesser grade 3/4” plywood because by design, none of it will ever be seen. (Because it’s a true “built in”, the exterior sides will be covered with drywall, and the front with a fir face-frame. The interior is mostly never seen because the appliances and drawers occupy most of the unit. The one exception is the overhead storage cabinet, which I plan to line with some sort of finish veneer wood.) But, the higher-grade plywood was on sale for $26 a sheet, which beat out the other stuff by $2.
While I was at the HD I decided to have the staff there use their panel saw to cut my plywood into 24” widths, as that is the depth of the cabinet. I figured this would make my life easier not having to carry full sheets of plywood up the three flights of stairs to our house from the street, nor would I have to manipulate them through the radial-arm saw in the shop. Of course I realized in bed that night that I had actually planned the cabinets to be 26” deep. Oops. So I spent Sunday ripping 2” strips and gluing them to the 24” pieces (using biscuits for strength and alignment..) This didn’t make me very happy.
By Monday morning I was just about ready to get rolling again. I glued up the last two pieces and let them dry for a few hours while I started construction. The cabinet has rabbit joints at the corners, and dado joints (?) for each of the shelves. Cutting the dados was a little problematic since I had to use my router instead of the dado-blade on the radial-arm saw, which didn’t have enough depth to accept 24” (er, 26”) panels. And because 3/4” plywood is actually 11/16” thick, I couldn’t use my 3/4” fluted router bit. So I made two passes with a 1/2” flute and cut each dado 1/4” deep and 11/16” wide. That took a while.
The back of the cabinet fits into another rabbit, 3/8” deep to accept the 3/8” plywood (Which I realized, is actually 3/8”. Why do they do this 11/16 crap for 3/4, but 3/8 is 3/8?)
To assemble this monster I brought all the pieces upstairs to our dining room floor, where I applied glue and fit it all together. I went a little nuts with the screws, but whatever. I started screwing the shelves together with 1 5/8” screws in a 6” pattern, and that’s what I ended up with. I probably used a hundred screws.
Getting this thing upright from horizontal on my dining room floor was a Herculean task, and I barely made it. By this time it was probably 3pm and I was starting to think about a nap, but I couldn’t very well leave this thing where it was. So I lifted it – all 5 sheets of plywood and 100 screws worth, to standing position. Man is this thing big.
And, really there was no use leaving it there, standing in the middle of the dining room. To get it in place I’d have to move the refrigerator, which itself is no lightweight at 630lbs. Fortunately it has wheels and I was able to heave it out of its position just enough that I could maneuver the cabinet into place.
Trissa called me around 3:40 and said she was on her way home, and this translated to me as “one last push” to get everything wrapped up. Using another 50 or so screws I installed my monster to the wall framing. I remembered to cut out a couple holes in the back-side for water and power to the refrigerator, then rolled the refrigerator back into place. By the time Trissa got home I was cleaning up.
And here it is. No face frame, no drawers, no oven or microwave. But it sure does help define the room a bit!
1 Comment
Derek·November 23, 2005
Nice job! I have to do some cabinet work in the basement soon. I was thinking of using the dado blade on the tablesaw. I have shims, so I should be able to match the depth of the plywood. It’s been a while since I’ve done anything like that though.